In the blog, we learn how to automatically annotate data for the People Instance Segmentation task using the YOLOv8-Seg model in Unitlab Annotate.
Unitlab Annotate: Batch Auto Annotation using YOLOv8
In our previous blog, we learned how to efficiently deploy the YOLOv8-Seg model on a server using TensorRT and ONNX, and we open-sourced our the deployment codebase.
 Shohrukh Bekmirzaev
Let's use this repository for the purpose of human instance segmentation.
Run YOLOv8 Segmentation Model
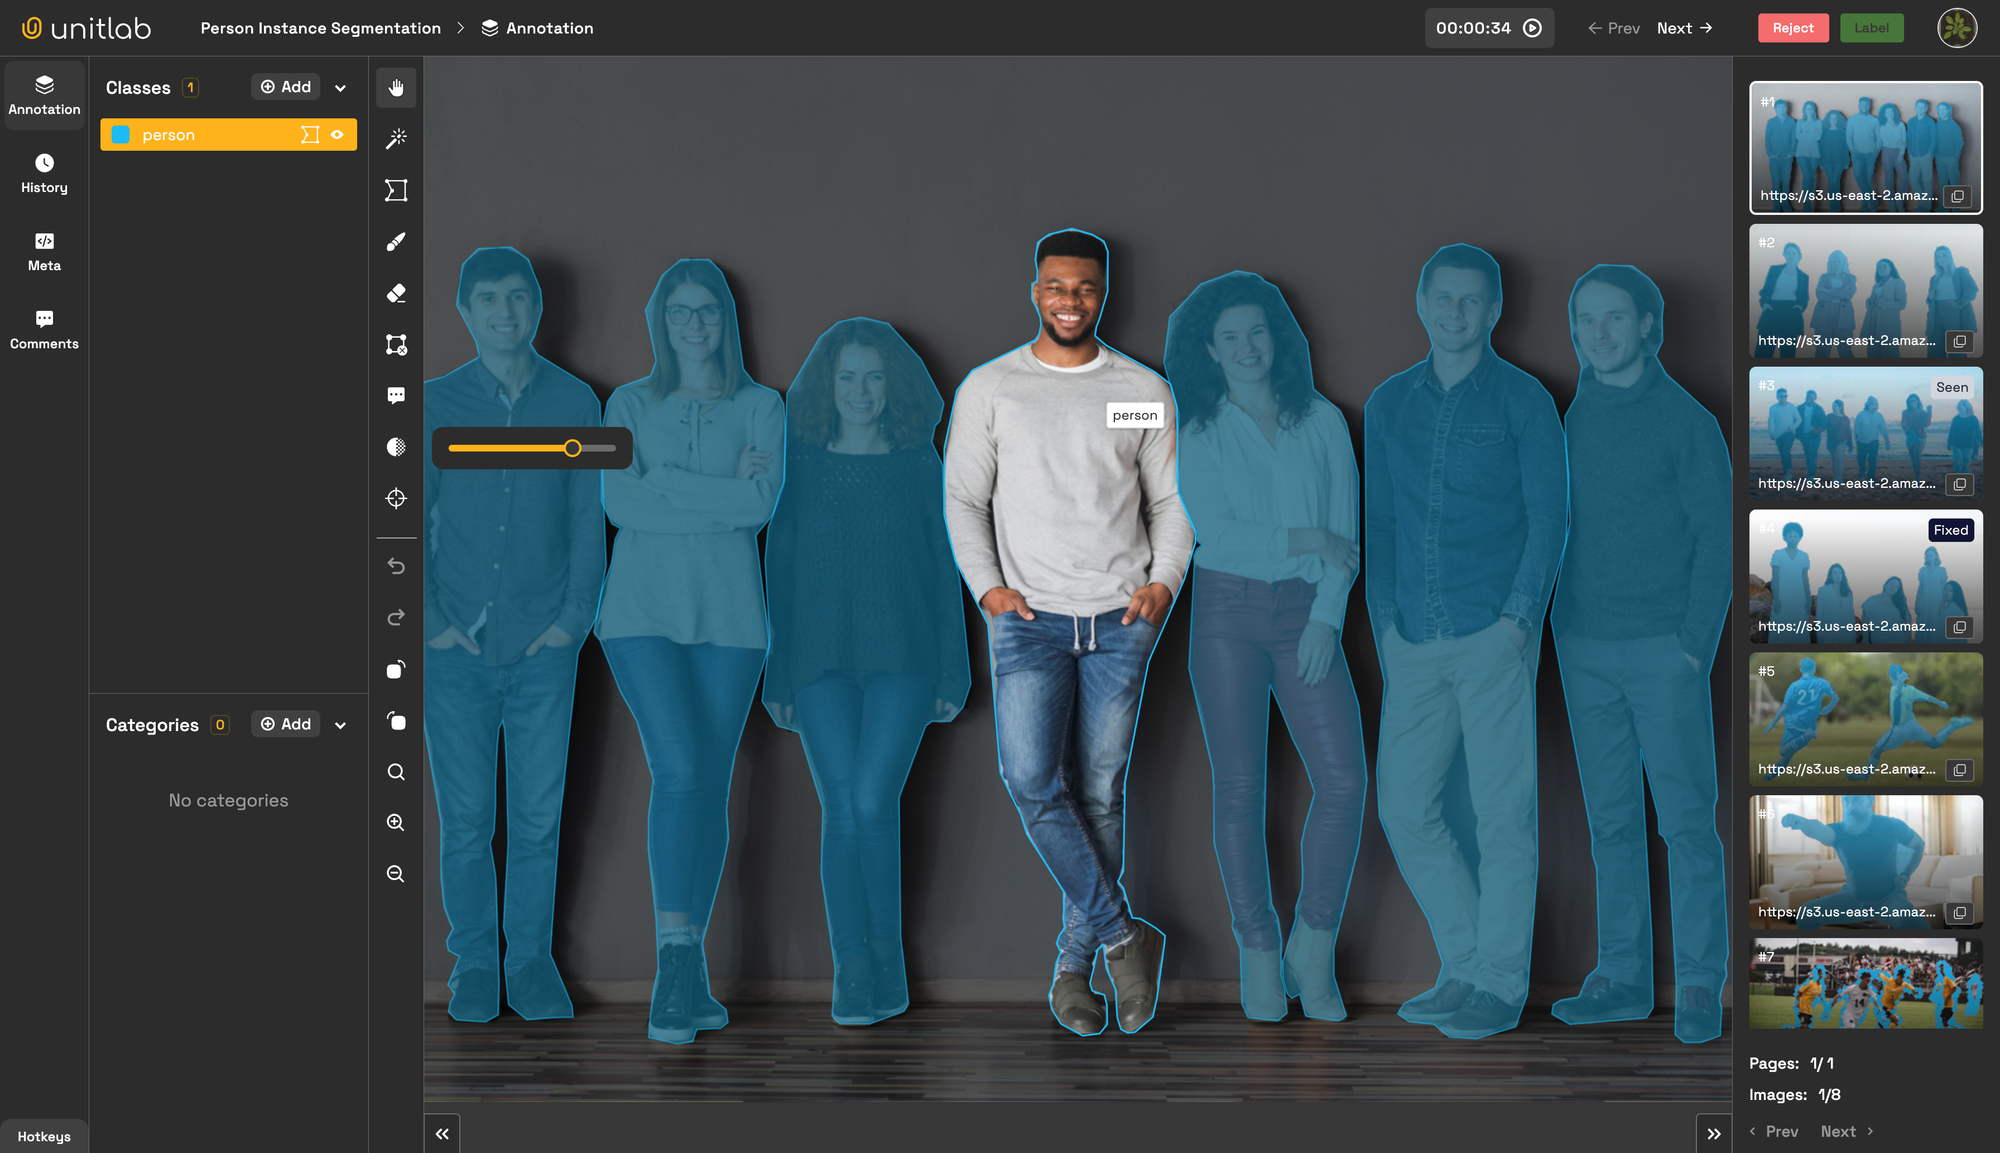
In this repository, we used the official Ultralytics YOLOv8-Seg model, trained on the COCO segmentation dataset. It is capable of segmenting 80 classes. For the People Instance Segmentation task, we extract the "person" (human) class from the predictions. Let's run the service and deploy YOLOv8 Model.
Clone the repository to your local as follows:
git clone https://github.com/teamunitlab/yolo8-segmentation-deploy.git
cd yolo8-segmentation-deploy
If your machine (server) has an NVIDIA GPU and it is correctly installed, you can utilize it for deployment; otherwise, you have the option to deploy using the CPU. Let's deploy on the CPU using a one-line command with Docker Compose.
docker-compose -f docker-compose-cpu.yml up -d --buildWe have already prepared the endpoint for Human Instance Segmentation using YOLOv8 segmentation model. You can view the implementation of this endpoint here.
@app.route("/api/yolo8/person-segmentation", methods=["GET", "POST"])
def run_person_segmentation():
  # Model inference & class extracting logic here
  return results
To test the service's endpoint locally, we can use cURL as follows:
# Using cURL
curl -X POST http://localhost:8080/api/yolo8/person-segmentation
     -H "Content-Type: application/json" \
     -d '{"src":"example.com/test-image.jpg"}'
You can change and adjust the port and IP address of the service in the NGINX and Docker Compose configuration files, "nginx-cpu-worker.conf" and "docker-compose-cpu.yml," respectively.
If the service (the endpoint) is working correctly, you can then proceed to integrate it into Unitlab. Let's explore how to integrate your AI models into Unitlab.
Model Integration into Unitlab
Generally, there are three main purposes for integrating your AI models into Unitlab, as follows:
- Visualization of Model Predictions - Easily visualize predictions of your pre-trained models, such as YOLOv8, in Unitlab.
- Auto Data Annotation - Utilize your pre-trained models for data annotation purposes in Unitlab Annotate with batch auto-annotation and crop auto-annotation tools.
- Model Evaluation - Evaluate your models on a specific dataset you uploaded in Unitlab and compare them with each other.
There is detailed documentation on how to integrate your AI model into Unitlab. Let's integrate the endpoint we run above for Human Instance Segmentation task.
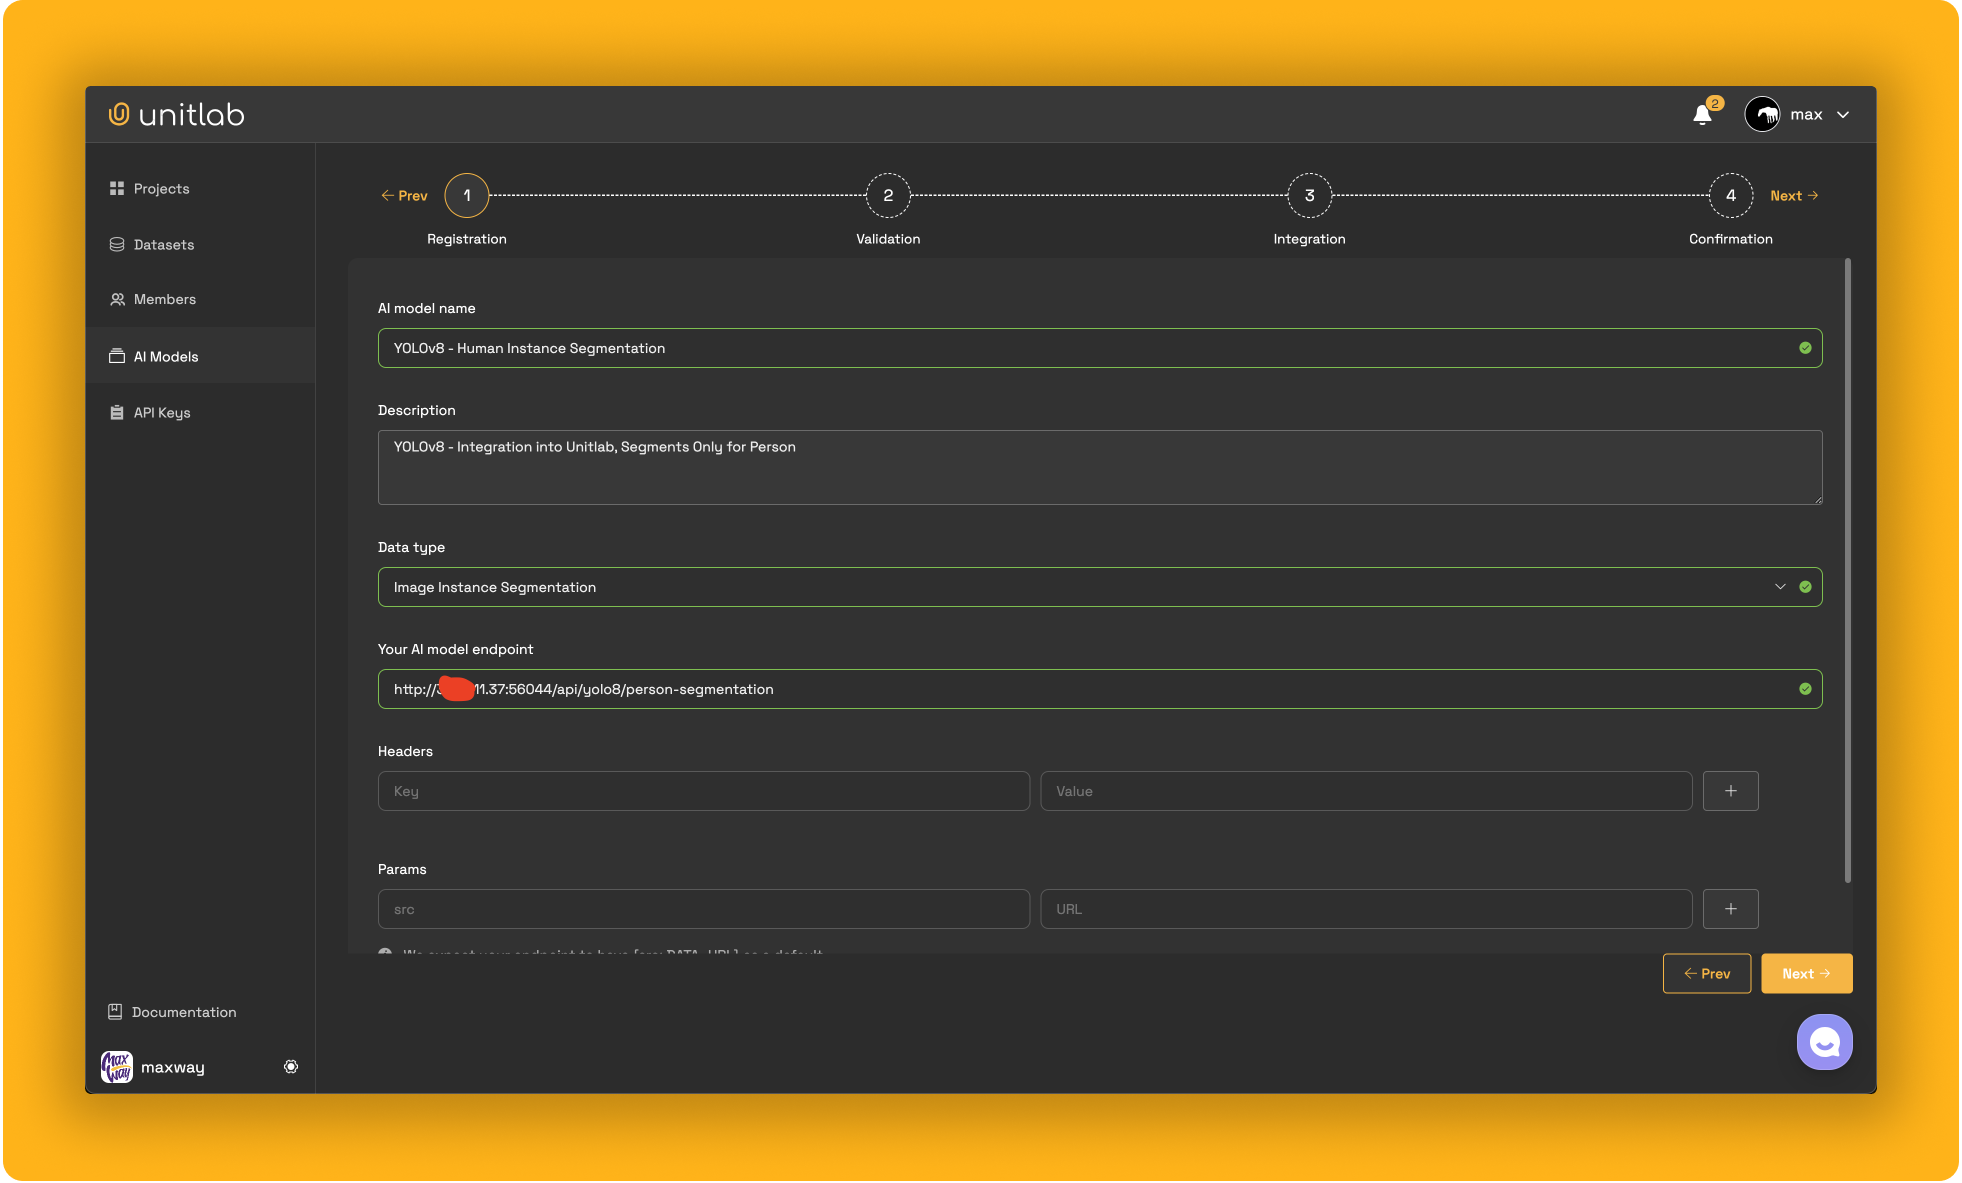
After completing the integration following the documentation, you can use your AI model for the purposes mentioned above.
1. Visualization of Model Predictions
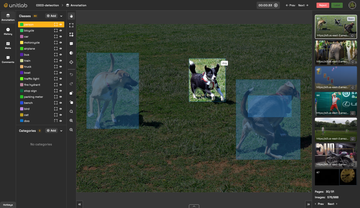
After integrating your model into Unitlab, you can evaluate its performance by visualizing the results of your AI model based on your test data. Let's take a look at a demo.
Unitlab Annotate: Visualization of Model Predictions
2. Auto Data Annotation
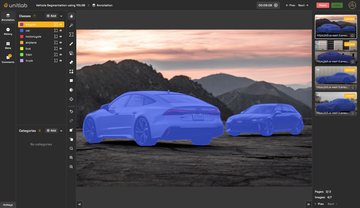
In Unitlab, your AI models can be used for auto-annotation purposes, streamlining the annotation process with sophisticated tools like batch auto-annotation and crop auto-annotation.
These features make it easier and faster to work with big datasets, helping you get them ready for machine learning projects quickly. By integrating your models into Unitlab, you can leverage these auto-annotation tools to enhance productivity, reduce manual labor, and improve the accuracy of your datasets. Let's see an demo!
3. Model Evaluation
Assuming you have multiple versions of AI models and need to find the best one, Unitlab simplifies this process for you. There's no need to write evaluation scripts or codes. Once you have integrated your AI model into Unitlab and uploaded the benchmark datasets, you can easily manage and review model evaluation reports within Unitlab. Let's learn how to evaluation your models in Unitlab!
- Integrate your AI models into Unitlab.
- Upload your benchmark dataset using Unitlab's CLI and Python SDK.
- Clone the uploaded dataset, create a project, and select the target AI model you have integrated.
- Compare the results of AI models with each other or with the ground truths of the benchmark dataset.
Conclusion
In conclusion, integrating your AI models into Unitlab can significantly enhance efficiency and accuracy by creating seamless automated data annotation, dataset management and model evaluation workflows. This integration not only streamlines the process but also reduces the likelihood of human error, ensuring higher quality outputs. Developers can spend more time improving their models and less time on manual tasks like annotation and evaluation. This makes the development process faster and more efficient, leading to quicker deployment of advanced AI technologies.