

In a nutshell, data annotation is the process of adding metadata to a dataset from which AI/ML models learn patterns and generalize to new data effectively. This can be as simple as drawing boxes around cars in a street (bounding boxes) or as complex as labeling every pixel in an image (segmentation).
Tackling data labeling is a multi-faceted challenge because of its scale and variety. First, datasets for real-world AI models are enormous, both for training and testing. Second, the optimal approach is context-dependent: labeling medical images to detect tumor cells requires a very different workflow and budget than annotating social media posts for sentiment analysis. Obviously.

In recent years SaaS and open-source data annotation platforms have risen considerably. These platforms, such as Scale AI, Roboflow, and Unitlab AI, handle data curation, dataset management, version control, collaborative labeling, and low/no-code auto-annotation tools, along with many other features that make dataset preparation faster, cheaper, and more reliable.
Low-code and no-code platforms are enabling businesses to streamline data annotation and automate complex workflows without extensive technical expertise, making application development and software creation more accessible to non-technical users.
In this guide, we will explore the potential of no/low-code auto-labeling tools with bounding box examples. We will also compare them with manual and scripting-based annotation. Our example will use Unitlab Annotate, a fully automated AI-powered annotation platform. A no code platform empowers non-technical users to participate in software creation and application development for data annotation tasks, democratizing access to advanced AI/ML workflows.
By the end, you will understand:
- What no-code and low-code tools mean for data annotation
- The differences between manual, scripted, and no-code approaches
- When and why coding is still essential
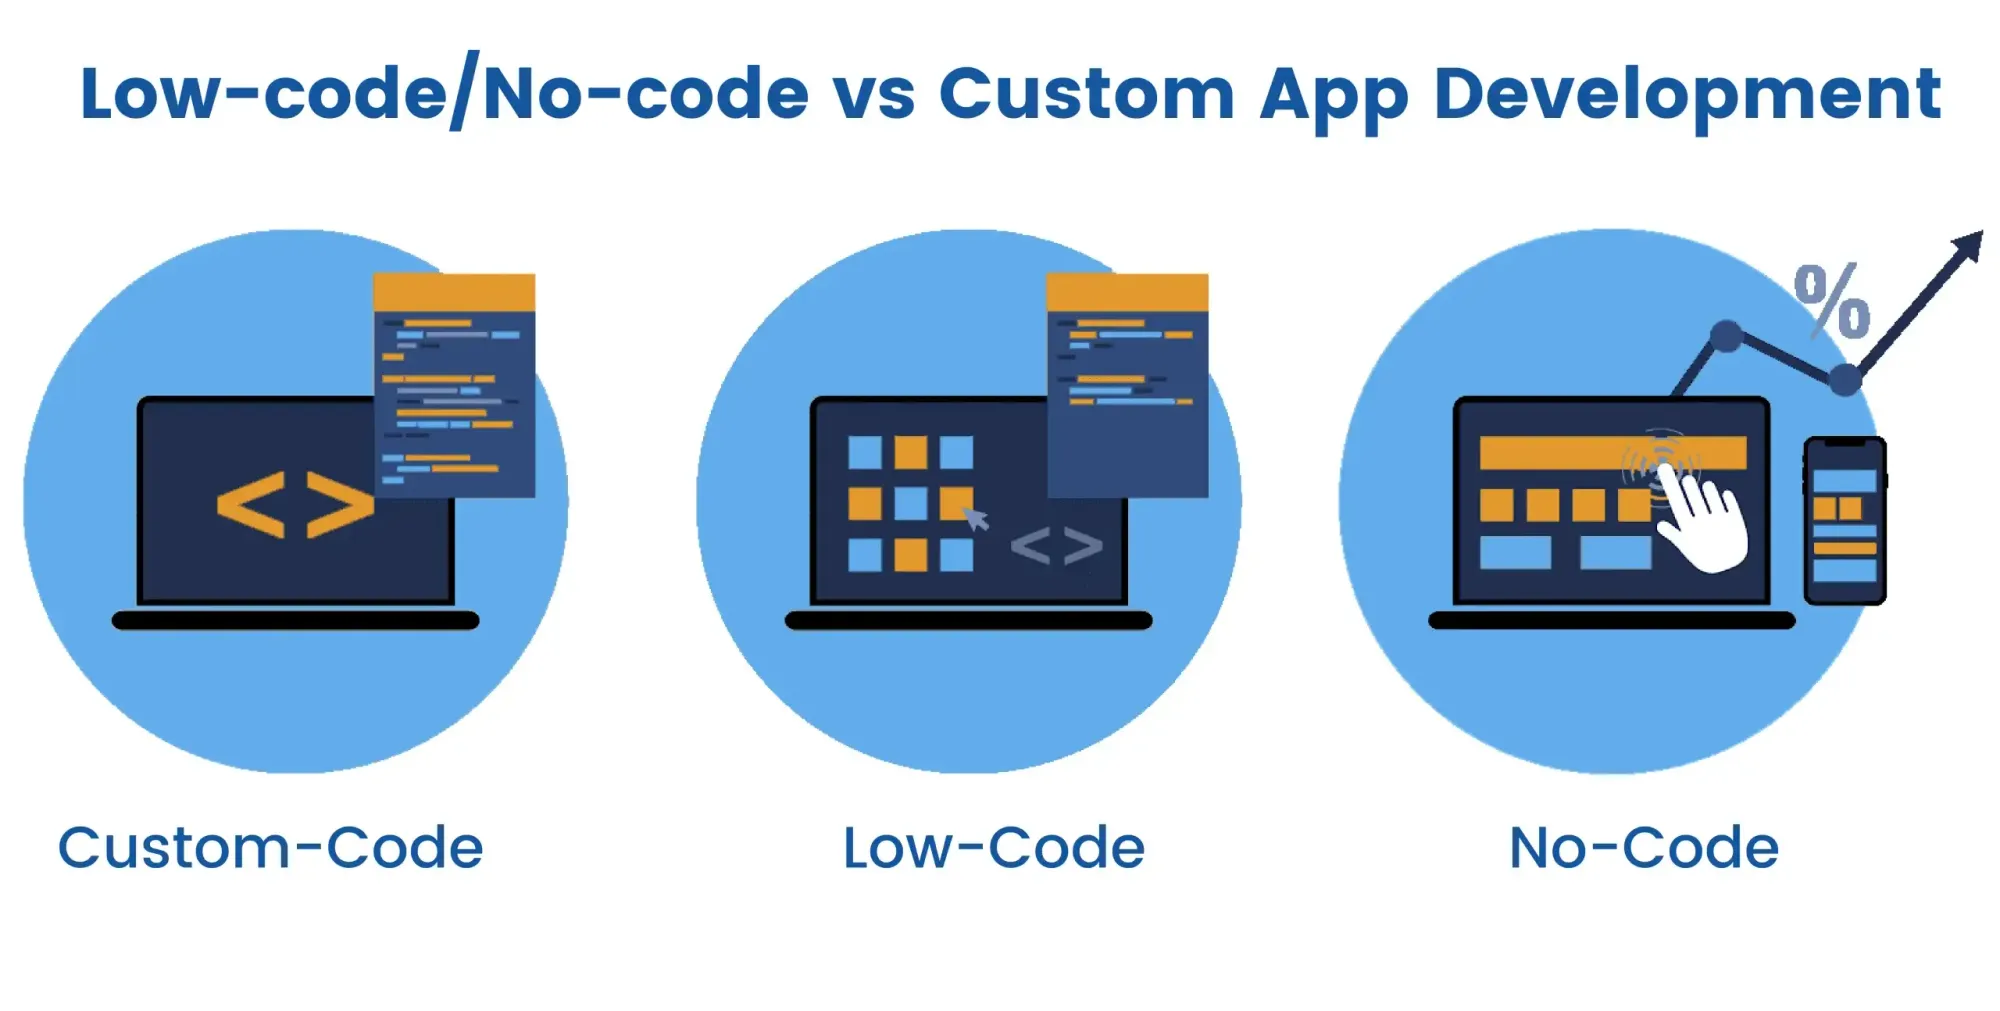
What are Low-Code and No-Code, Essentially?
In short, low/no-code tools are platforms where users can develop applications with little to no programming. These tools rely on intuitive drag-and-drop interfaces and pre-built components. As a result, they make app development accessible to business users and professionals without programming backgrounds.
With these platforms, users can build mobile apps, websites, and internal tools quickly. They are particularly useful for small projects or when time and resources are limited.
In fact, many SaaS companies are now starting to adopt this approach, as shown in this showcase from Bubble.io. Compared to traditional code development, no code development platforms significantly reduce the need for manual coding, allowing faster deployment and easier maintenance.
Although the terms are often used similarly, they differ slightly:
- No-Code – Everything happens visually. Users upload data, drag and drop, and build workflows through a graphical interface. No coding required.
- Low-Code – Combines visual tools with optional scripting. Users handle tasks in the UI, but can write code to extend functionality when needed.
No code development and no code development platforms have transformed the landscape by making application creation accessible to a wider audience. This shift empowers non-technical users to participate in software development without requiring extensive programming knowledge.
Manual Data Annotation
Manual labeling means annotators draw bounding boxes around cars, people, or other objects by hand. The software then generates machine-readable annotation files. This process often involves repetitive manual data entry, which can be time-consuming and error-prone.
This method produces high-quality labels but is slow, expensive, and prone to human error. Manual tasks and data entry increase the risk of errors and require significant human intervention, making the process less efficient and more costly.
Here is a demonstration of drawing bounding boxes manually in Unitlab Annotate:
Manual Object Detection | Unitlab Annotate
Manual annotation works when you have 100 images. But it becomes impossible to manage when you have 100,000. At scale, manual labeling simply fails in multiple dimensions. Automating these steps can help reduce manual errors, minimize manual tasks, and improve overall efficiency.
Scripting for Data Annotation
Another option is writing scripts, most often in Python, to automate labeling. Since many open-source libraries exist (such as OpenCV, Pillow, and Ultralytics), the idea is to automate much of the process with code.
However, while scripting can automate certain steps, dedicated workflow automation software can streamline the entire automation process more efficiently by providing integrated tools, process mapping, and business rule definitions.
A typical workflow looks like this:
- Write a Python script to load images
- Use libraries to draw bounding boxes
- Save annotations in JSON, XML, or COCO format
- Re-run and debug scripts whenever the dataset changes
Let's implement this using Python. The source code for this project is available on Github.
Demo Project
We will use YOLOv8 from ultralytics. Start by installing the required packages:
pip install ultralytics opencv-python numpy
We now write the program, starting with importing the installed packages. We use the YOLOv8n as our object detection model, read the test image with open-cv:
# main.py

import cv2
from ultralytics import YOLO

# Load YOLOv8 model
yolo_model = YOLO("yolov8n.pt")

# Load an image
image_path = "test.jpg"
image = cv2.imread(image_path)
Finally, we detect the object with YOLOv8 and draw bounding boxes with Python's Open Computer Vision package:
# Perform detection
results = yolo_model(image)

# Draw bounding boxes and display results
for result in results:
    for box in result.boxes:
        x1, y1, x2, y2 = map(int, box.xyxy[0])
        label = result.names[int(box.cls[0].item())]
        confidence = box.conf[0]

        # Draw bounding box
        cv2.rectangle(image, (x1, y1), (x2, y2), (0, 0, 255), 5)
        cv2.putText(
            image,
            f"{label}: {confidence:.2f}",
            (x1, y1 - 10),
            cv2.FONT_HERSHEY_SIMPLEX,
            1.2,
            (0, 0, 255),
            4,
        )

cv2.imshow("Detection", image)
cv2.waitKey(0)
In the end, we get this image as the output:

The results, such as detected objects and their coordinates, can be organized in data tables for easier analysis and tracking.
This method assumes you have an experienced engineer capable of writing and maintaining complex Python programs. For small datasets, the cost of that engineer may exceed the value of the project itself. Moreover, editing boxes for accuracy is harder in code than in a GUI.
While powerful, this process demands strong coding expertise and maintenance hurdles, which may not be worth it in most projects. Performance metrics such as accuracy and processing time can be used to evaluate the effectiveness of the annotation workflow.
No-Code for Data Annotation
Project Setup
First, create your free account on Unitlab AI for this tutorial:
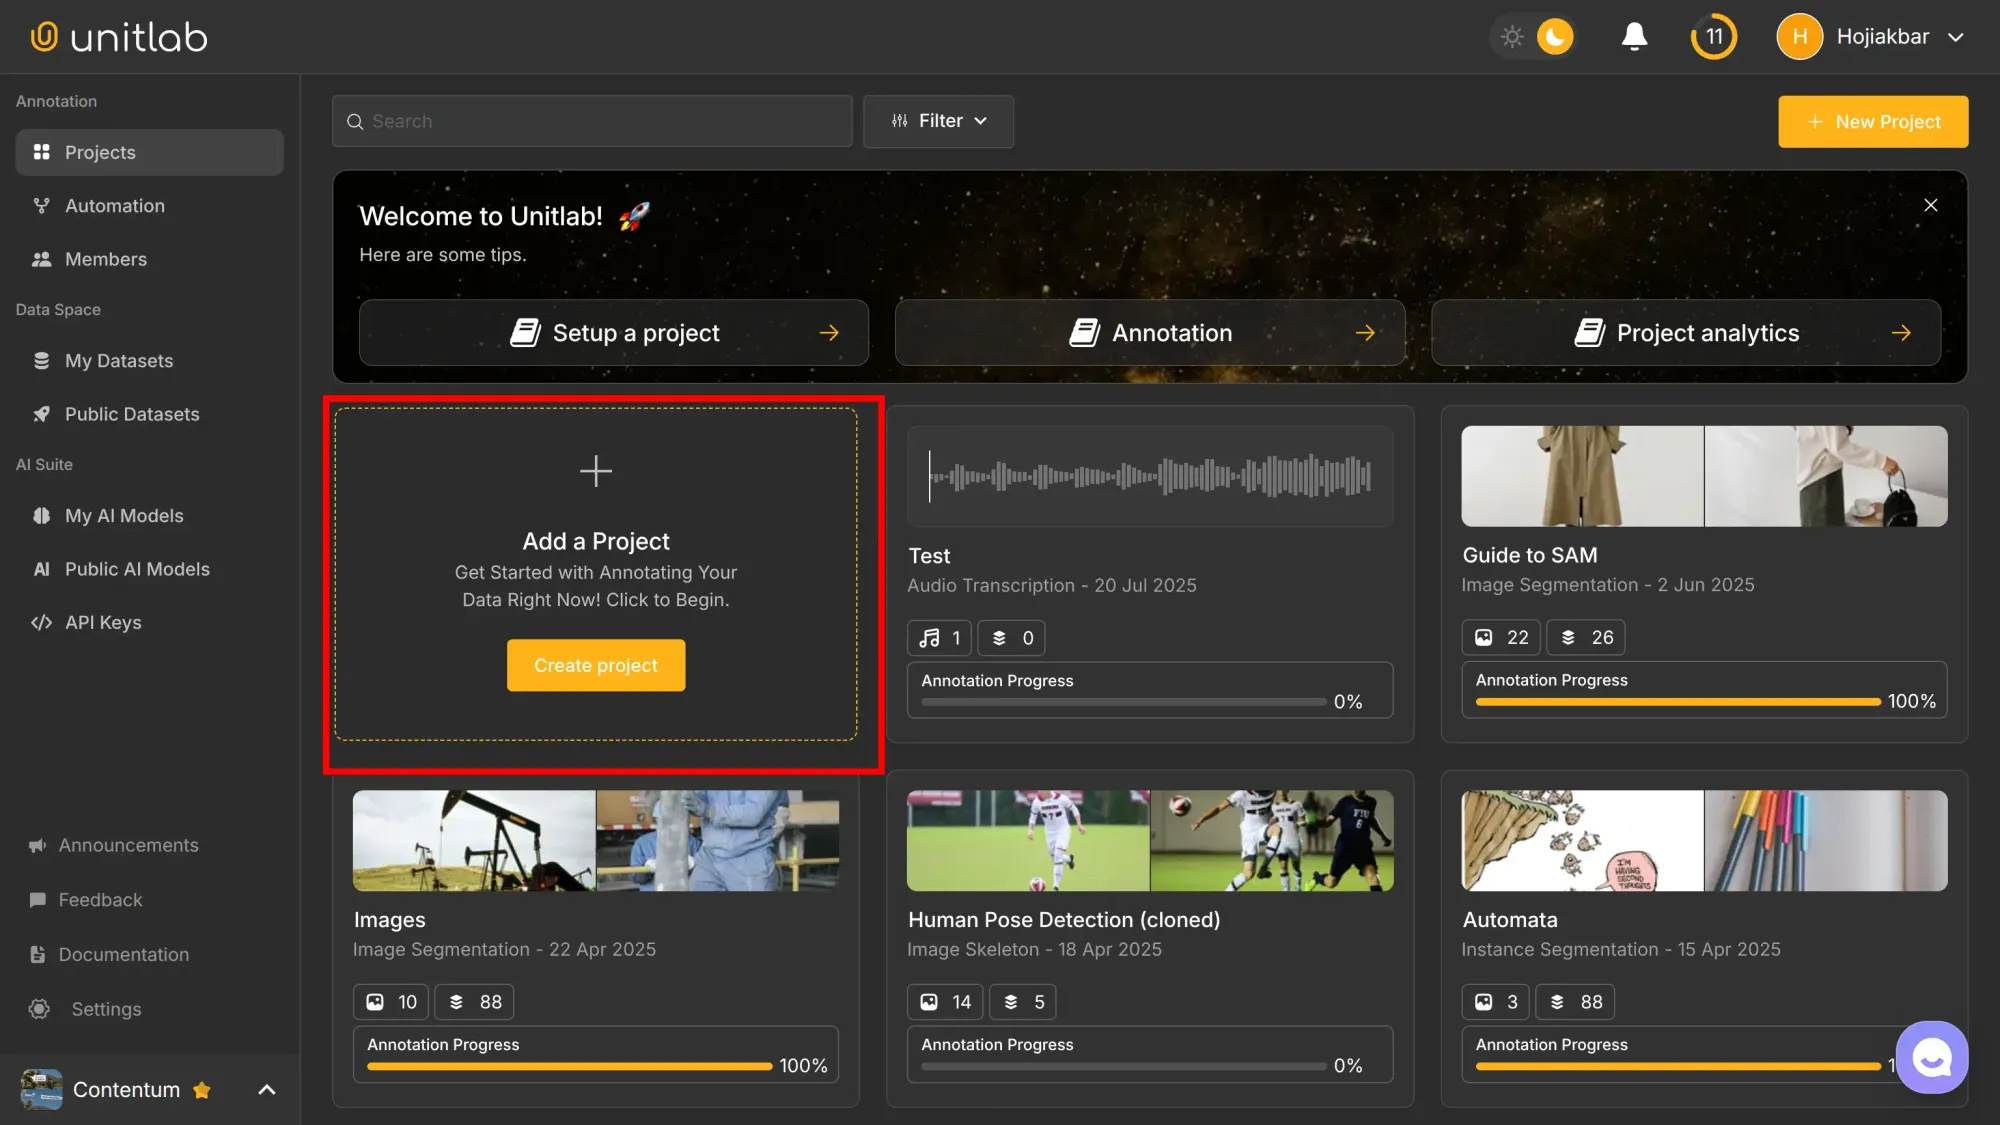
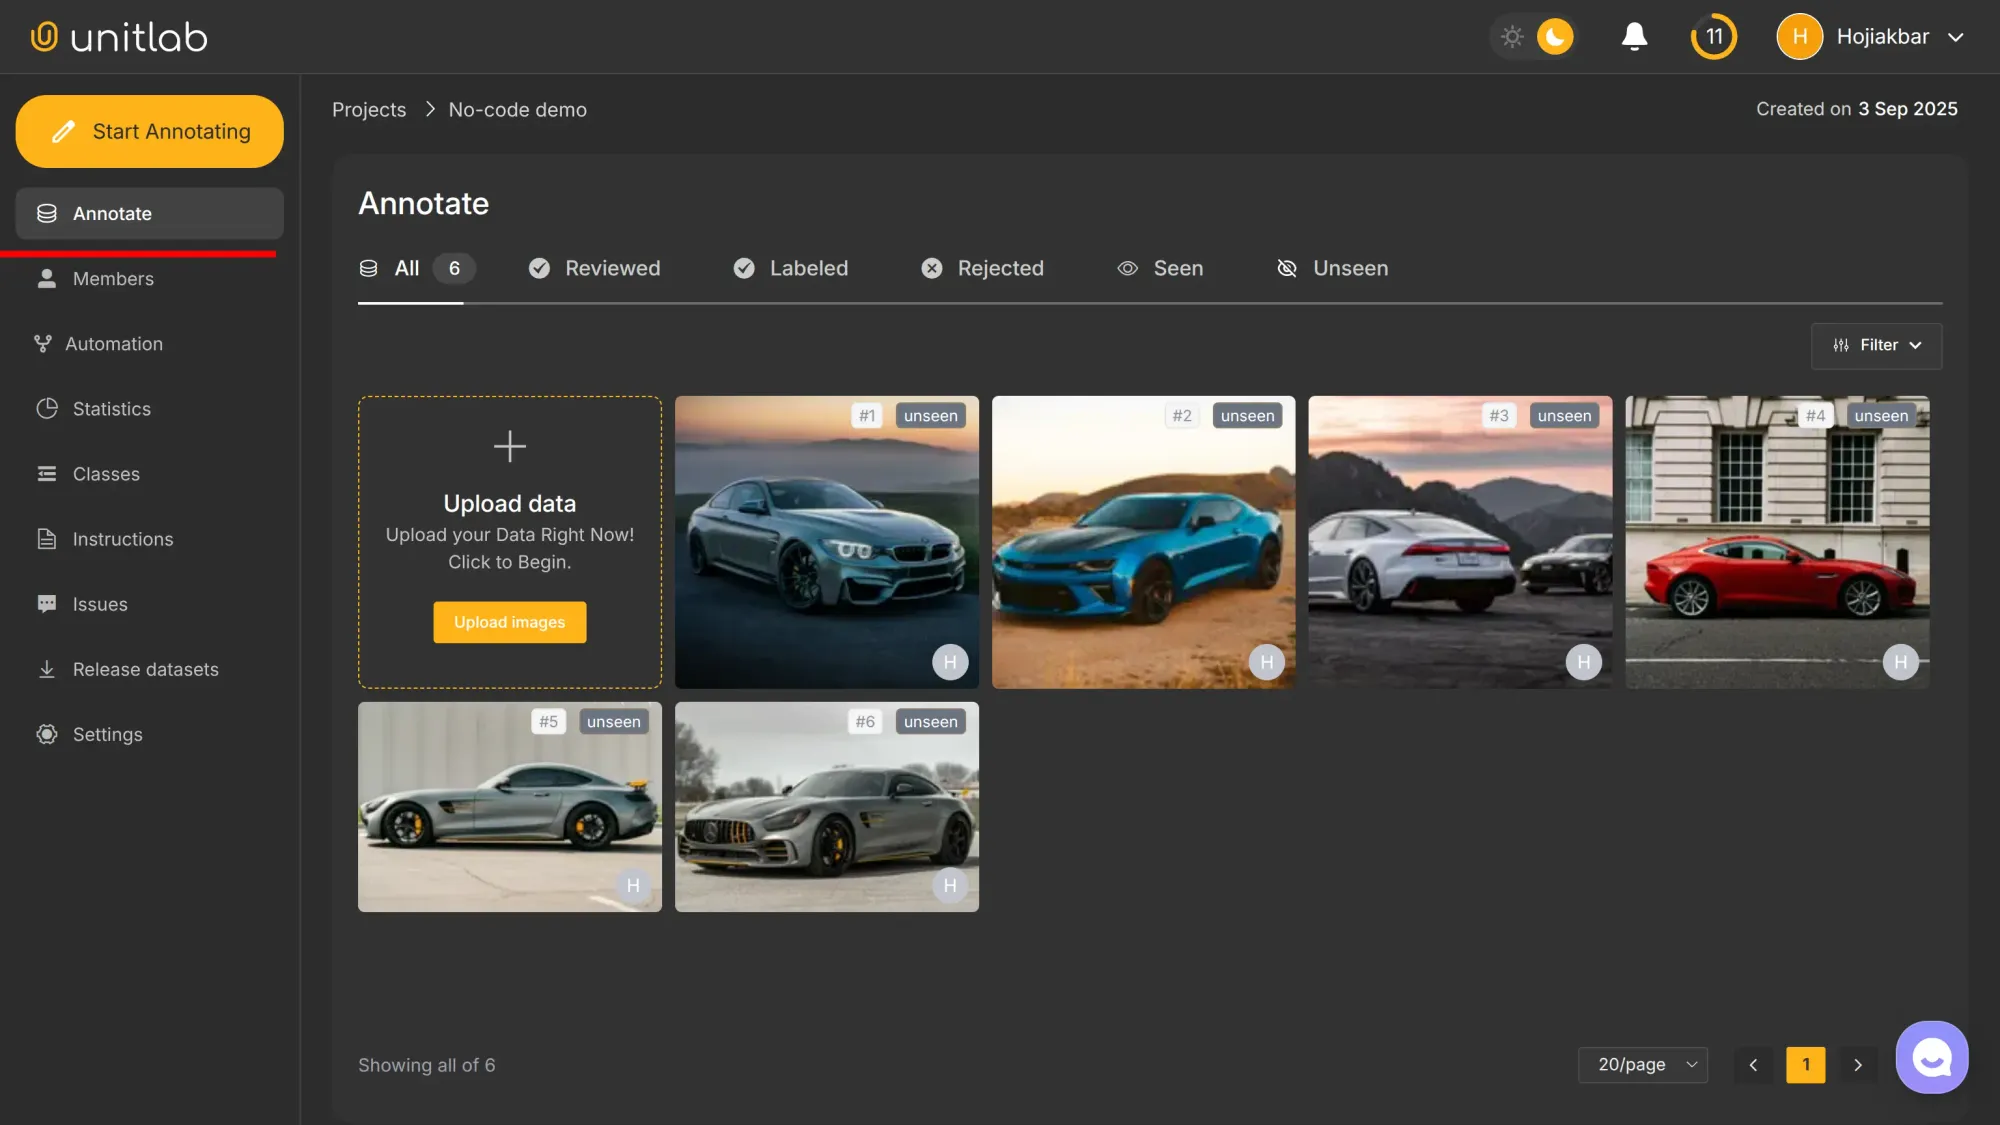
In the Projects pane, click Add a Project:
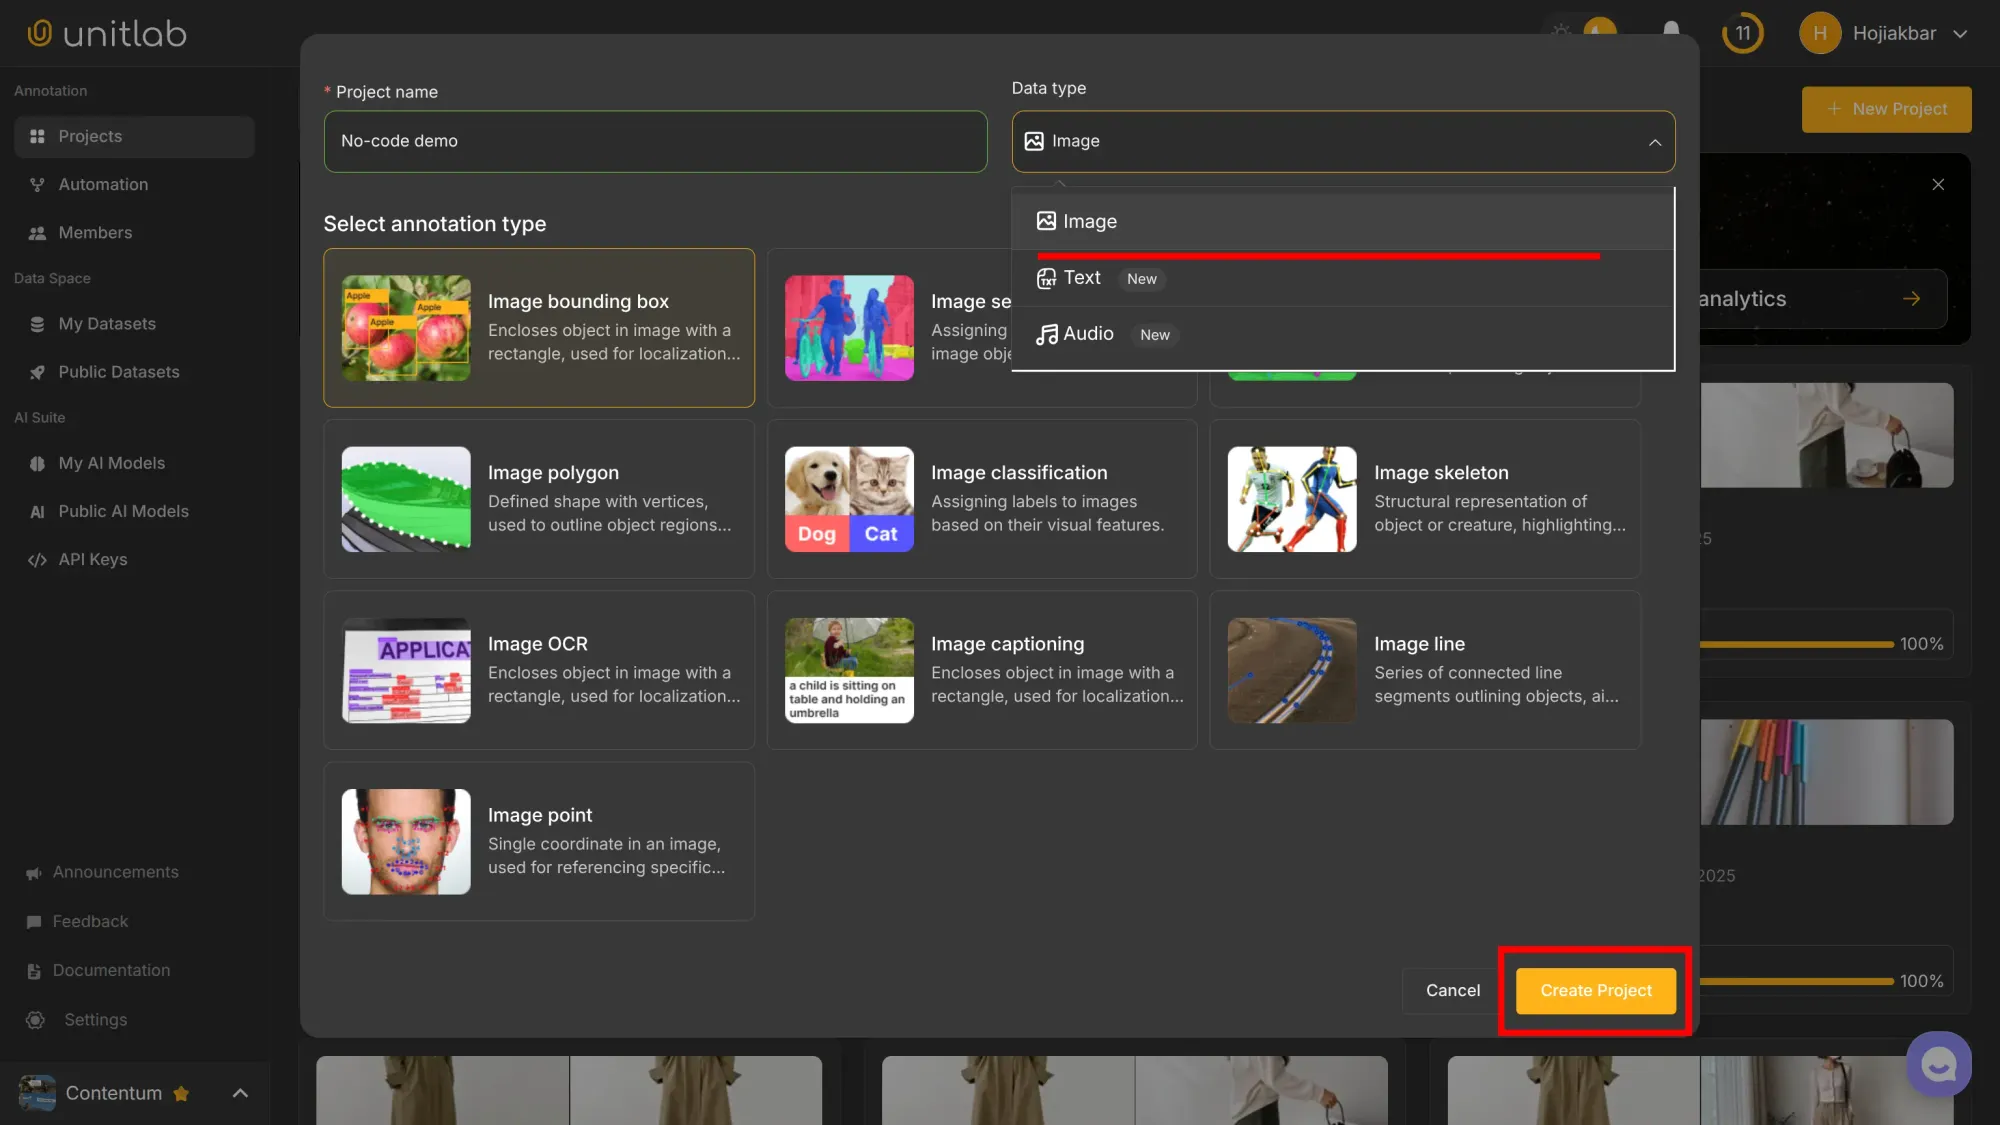
Name the project, choose Image as the data type and Image Bounding Box for the annotation type:
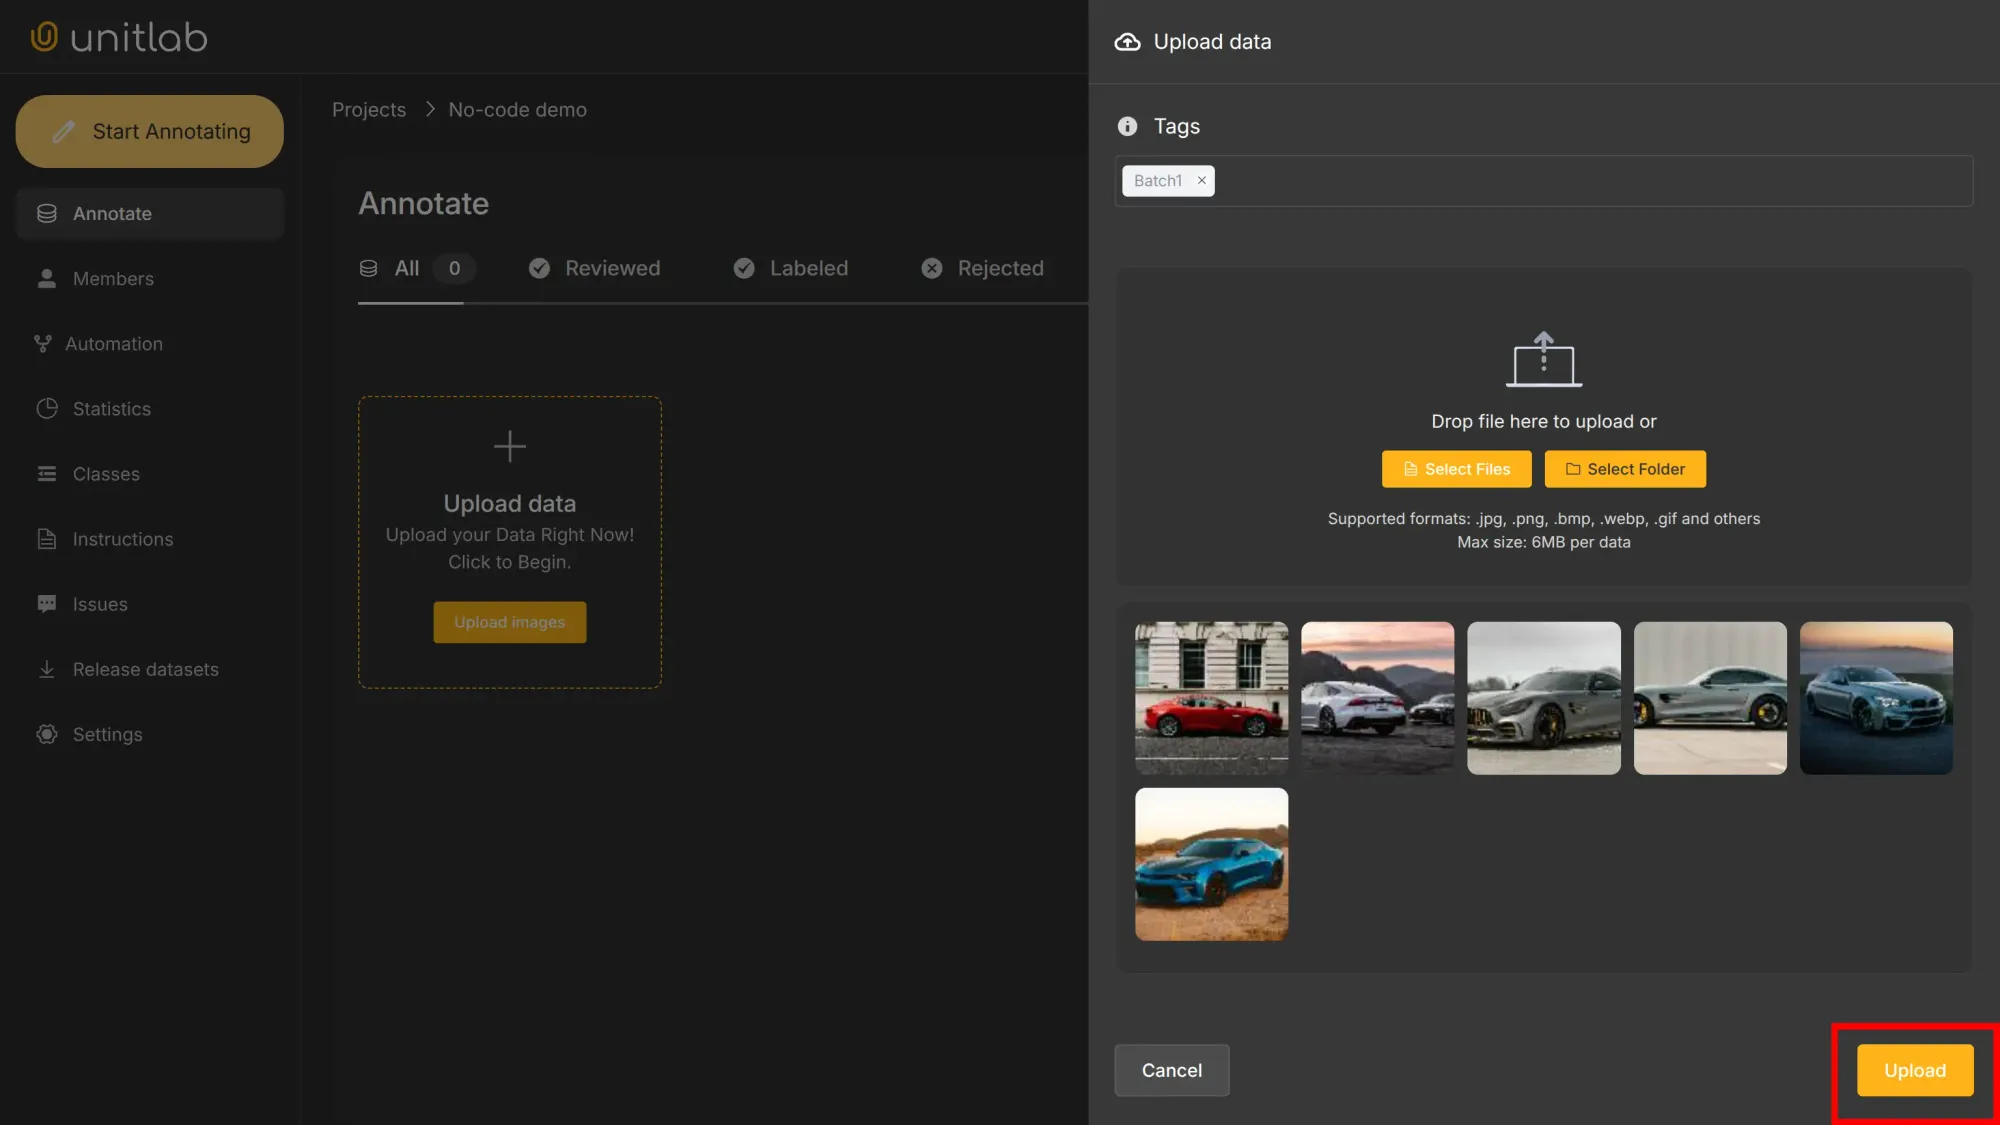
Upload project data. You can use these samples we are using for this tutorial. Download them here:
Automation Config
One big advantage of data annotation platforms is that they include common computer vision models (such as object detection and instance segmentation) as built-in tools. Or you can bring your own models, i.e. integrate with a data annotation platform.
In the first way, you don’t need to configure, deploy, or manage auto-annotation models yourself. You can simply use them in your projects for free. Pretty slick, no?
In the case of Unitlab Annotate, go to the Automation pane within your project:
Click + New Automation:

Once created, you will see this drag-and-drop dashboard, which allows you to easily configure features such as collaboration, models, and others:
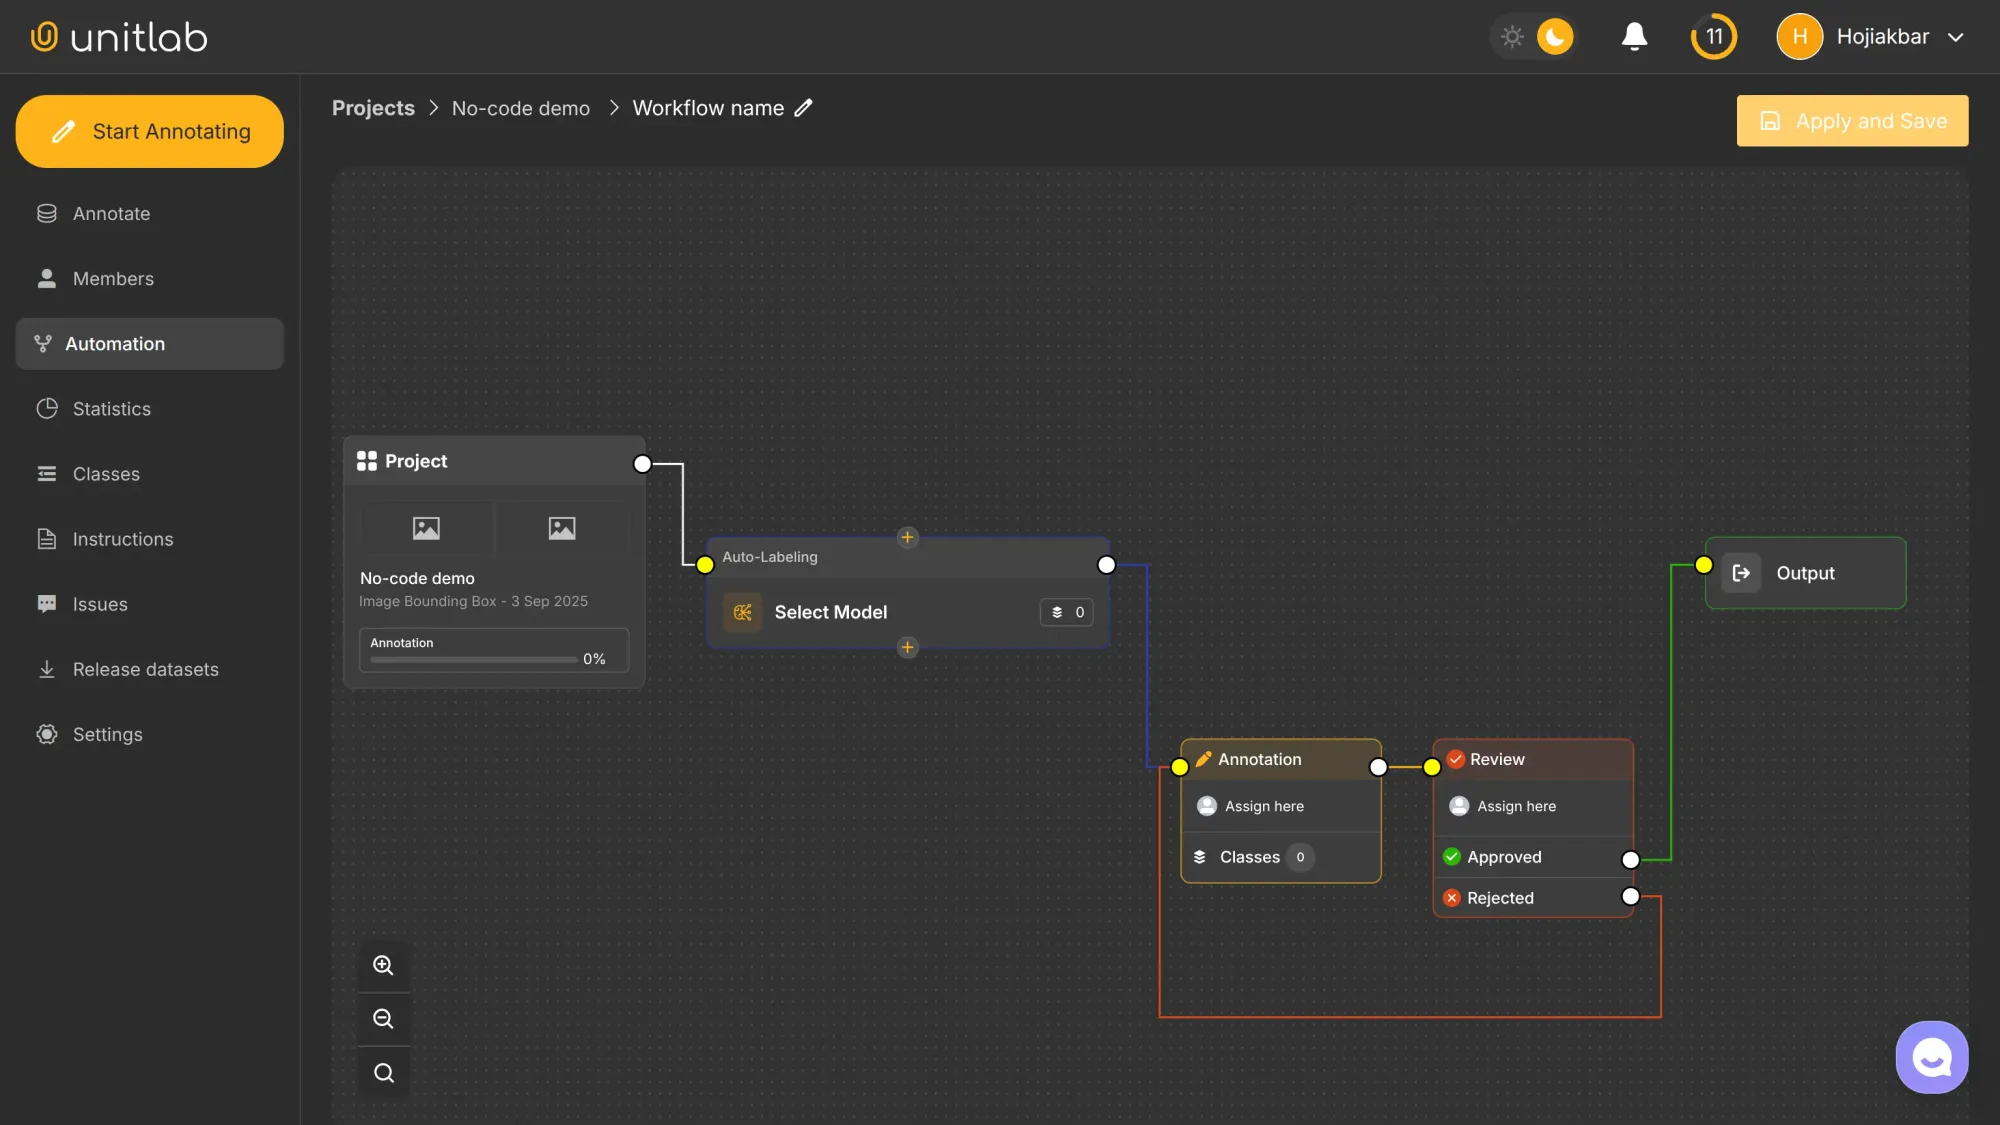
Click Choose Model and select Vehicle Detection:
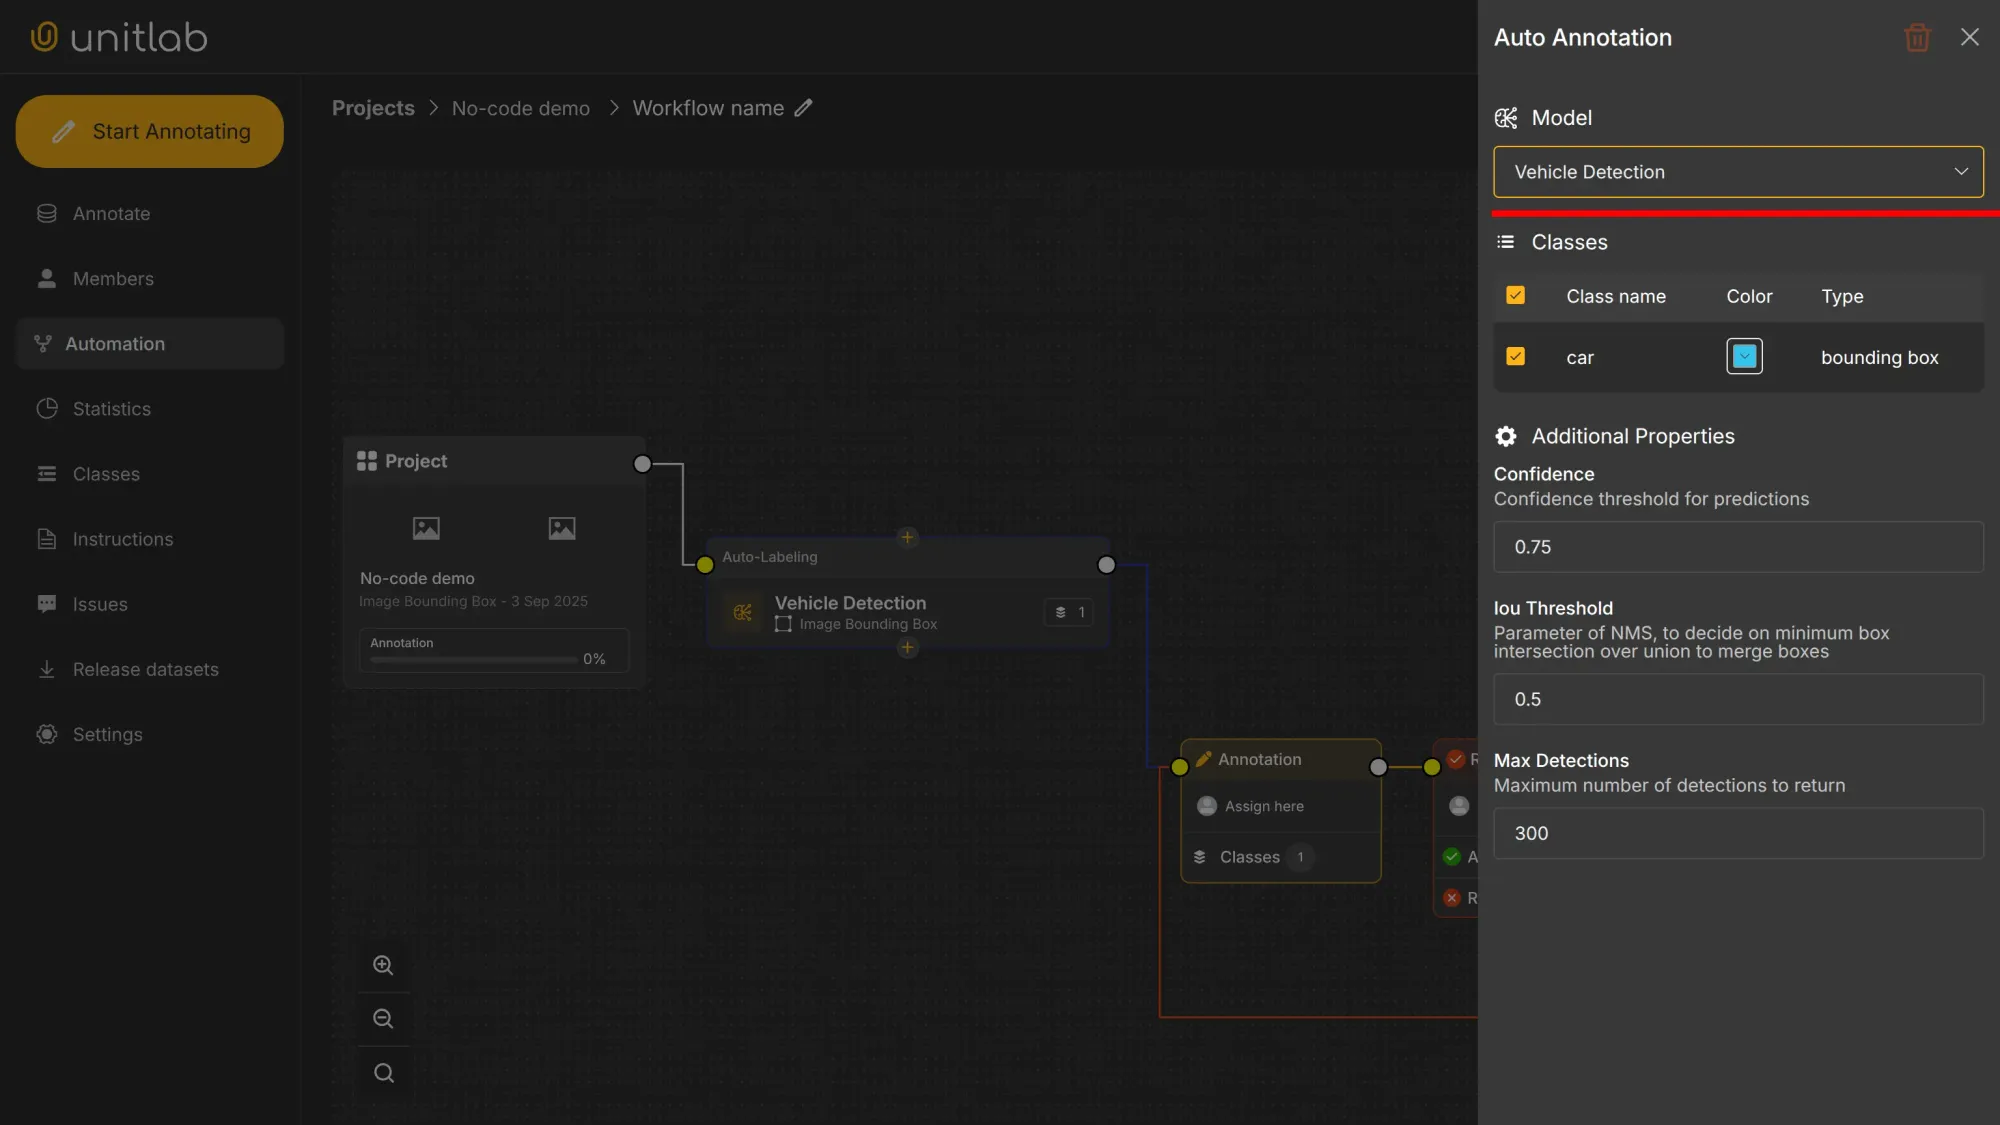
In this pane, you can set the confidence threshold, IoU threshold, and the maximum number of detections per image. When you choose a foundational model, it provides its own defaults, which you can edit for your project needs. For our tutorial, we leave it as it is.
Give your automation a clear name, such as "Vehicle Workflow". Click Apply and Save. The no-code tool is now set up for our vehicle annotation. Return to Annotate pane.
No-code Annotation
Most data annotation platforms provide tools to use the no-code annotation once configured. With Unitlab Annotate, we’ll use the Magic Crop Tool to automatically detect cars and draw bounding boxes around them:
No-code Data Labeling | Unitlab Annotate
This project is simple for illustration purposes. However, your requirements, objectives, and tasks evolve notably as your project grows. So does your data labeling.
With these tools, you can easily adjust them for your use case instead of changing your code base. Because your provider fully manages these annotation tools, you can focus on the business goal at hand, not on the specifics of a Python library or cloud deployment.
The main advantage of this no-code interface is how easily you can edit bounding boxes. It also supports auto-generating machine-readable annotation files in multiple formats, along with project management, dataset organization, and versioning: features you’d expect from a full data annotation platform.
The platform also streamlines project management by facilitating assigning tasks to team members, which helps coordinate efforts and reduces manual effort.
With the Pro plan of Unitlab AI, you can also run Batch Auto-Annotation to label hundreds of images at once using your custom workflow.
No-code Batch Auto-Labeling | Unitlab Annotate
Comparison: Scripting or Low/No-Code?
The table below gives a quick comparison between scripting and low/no-code tools for data annotation.
| Aspect | Scripting (Python) | Low/No-Code (Unitlab AI) |
|---|---|---|
| Setup | Manual environments, dependencies | Visual dashboard, templates |
| Annotation | Custom scripts, CLI tools | Auto-labeling, drag-and-drop UI |
| Collaboration | Git, shared folders | Roles, comments, dashboards |
| QA & Versioning | Manual checks, extra code | Built-in QA, dataset versioning |
| Scalability | Rewrite scripts for new cases | Scales seamlessly via UI |
| Speed & Cost | Developer hours, slower iteration | 15× faster, 5× cheaper (Unitlab) |
When Code is Supreme
This comparison and post are not here to dismiss coding or Python in the realm of data annotation. Only the Sith deal in absolutes. Our intent is to say that both coding and visual no-code tools have their own uses, and often are complementary.
Scripts remain supreme for many complementary, legitimate cases:
- Custom one-off tasks not supported by platforms.
- Unique formats or specialized exports.
- Deep research pipelines that demand custom integrations.
For everyday tasks like object detection, segmentation, and classification, low-code/no-code platforms such as Unitlab Annotate are now the better default.
Conclusion
Data annotation is a central step in building practical, real-world AI systems. It is possible to approach this task in several ways, depending on the project nature, size, manpower, and budget constraints. Therefore, the legitimate answer to "How should I label my dataset" is, "It depends."
Still, no-code and low-code annotation platforms are gaining traction because they combine automation, collaboration, and ease of use. Scripts and manual annotation remain useful complements, but increasingly, no-code is the default path.
In 2025, the question isn't whether to adopt these tools. It's how quickly and efficiently you can integrate them into your workflow.
Explore More
For additional information, check out these resources:
References
- alwaysAI (Dec 3, 2024). Low-Code vs No-Code Computer Vision Platforms. IoT for All: Source
- Frederik Hvilshøj (Mar 14, 2023). How to Use Low-Code and No-Code Tools for Computer Vision. Encord Blog: Source
- IBM Cloud Education Team (no date). Low-Code vs. No-Code: What’s the difference? IBM Think: Source
![Audio Data Annotation with Unitlab AI [2025]](/content/images/size/w360/2025/12/audio-unitlab.png)