In any process, the quality of output depends on the quality of the input, known as Garbage In, Garbage Out. For your computer vision projects, data annotation plays a central role in the process. Data labeling is the process of marking and tagging data so that it is recognizable to machines.
The importance of clean, structured labeled images cannot be stressed enough. To create and train accurate, practical computer vision models, ML engineers need clean, consistent, and accurate labeled image sets. In this way, these models can accurately predict, recognize, and classify repetitive patterns in the image that they see for the first time.

In order to improve the accuracy and consistency of your image annotations, we have come up with 7 general, yet practical best practices for image labeling.
Obviously, they are general tips; the nature of the task at hand requires specific adjustments. That said, the tips below are traditionally effective at accurately labeling most images.
For this post, we will illustrate best practices with bounding boxes. Even if you use polygons, lines, or pixels for data labeling, these practices will stay similar as the intuition behind is the same for all types.
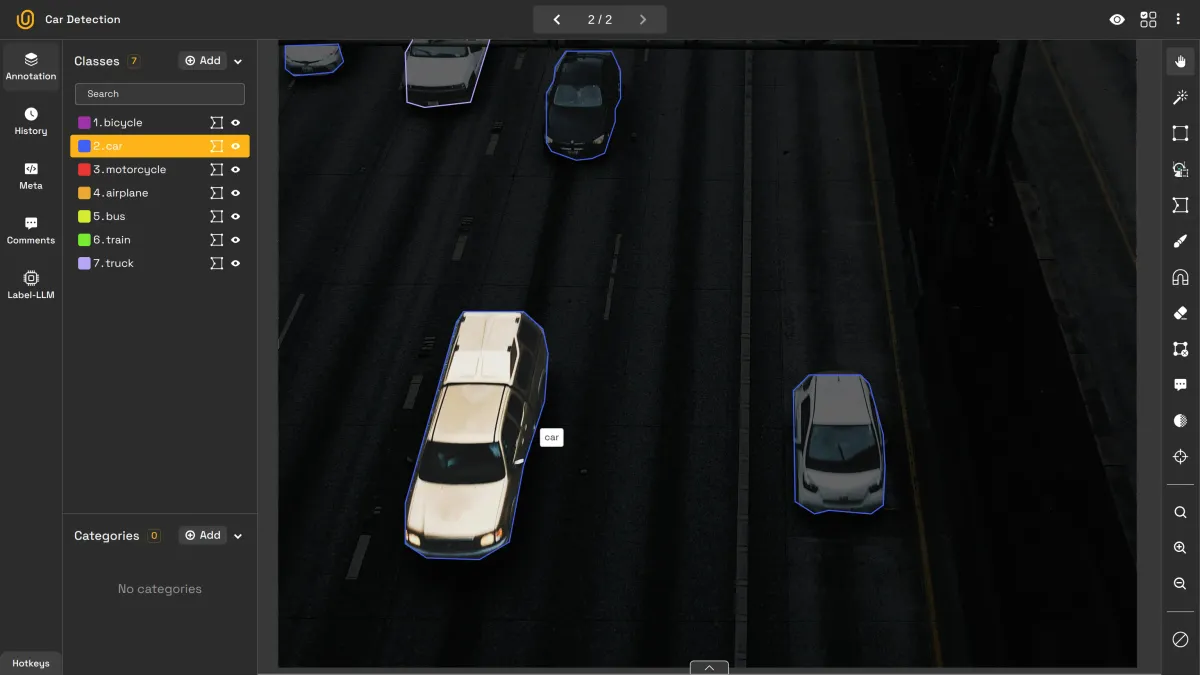
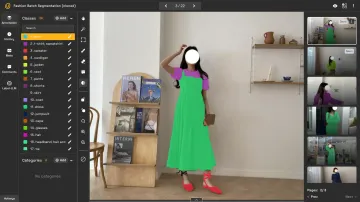
Image Annotation Types | Unitlab Annotate
By the end of this post, you will have 7 concrete tips that you can start using today to improve accuracy of your models.
Let's get started.
1. Label objects in their entirety
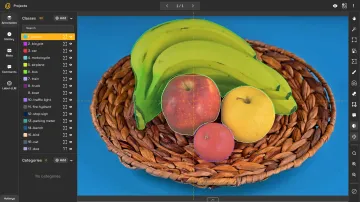
The most essential tip for image annotation is to label objects in their entirety, i.e. fully. This means not leaving out any parts of the object during annotation. Fully-labeled objects enable ML models to learn patterns effectively.
If some objects are labeled partly, and some fully, the model has confusion in differentiating the whole object from its partial version. Needless to say, this decreases a model's performance and may even lead to AI hallucinations.
If you get only one tip from this post, it is this: label objects of interest in their entirety.
With that said, what if only a part of the object in our interest is visible?
2. Label occluded objects
Sometimes, only some part of the object is visible in the image/video frame. Another object might be blocking its view. The angle might not be right. In any case, our object to label might not be fully visible.
In this case, it becomes an occluded object. From Wikipedia, it refers to this:
An occultation is an event that occurs when one object is hidden from the observer by another object that passes between them. The term is often used in astronomy, but can also refer to any situation in which an object in the foreground blocks from view (occults) an object in the background.
Suppose you're labeling pedestrians in street images. One person is walking behind a pole, so only half their body is visible.
You should still draw the bounding box or segmentation mask around the entire person, not just the visible half.
Why? Because during training, the computer vision model learns that people can appear partially hidden. If you label only what's visible, the model may later misclassify partially occluded people as background.
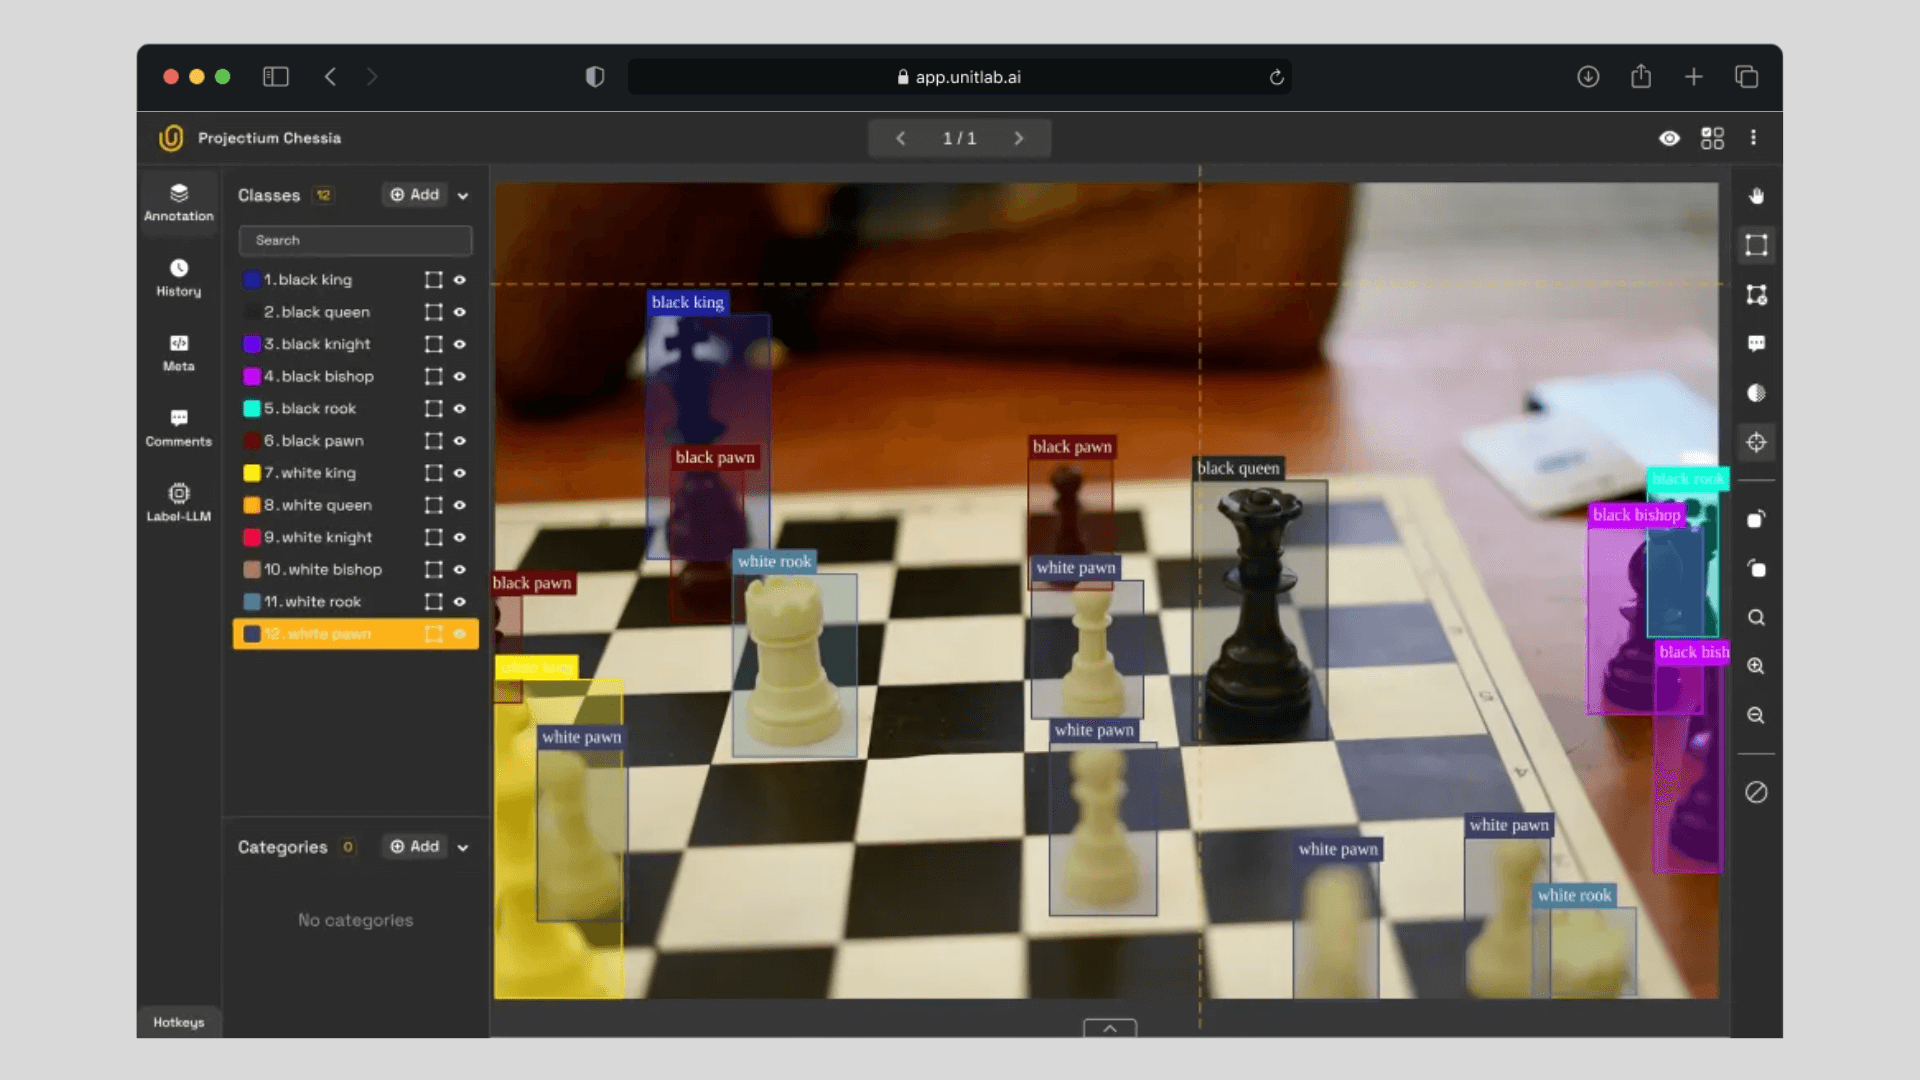
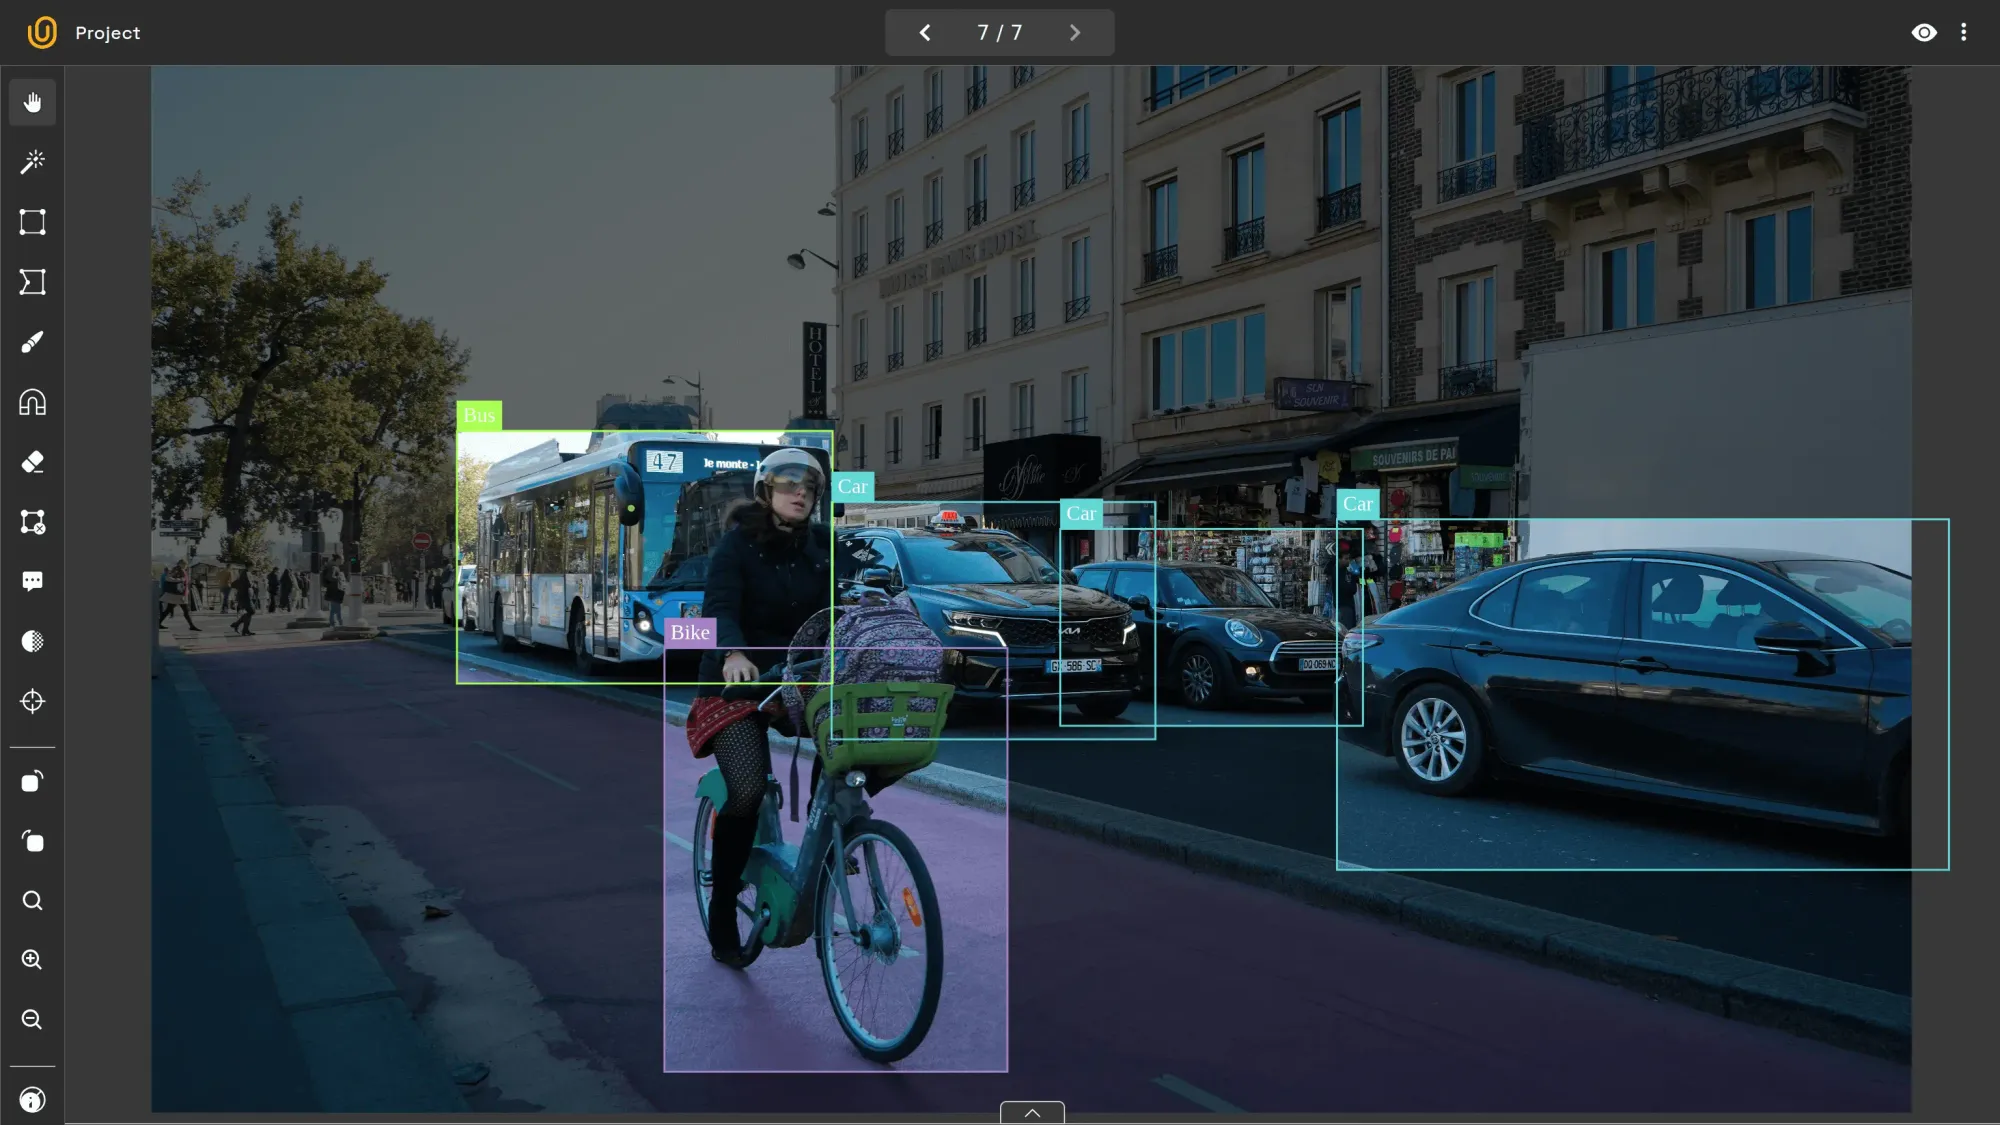
In short, you should label partially-visible objects as if they are in full view. Here's an example of labeling occluded vehicles:
Including occluded objects while annotating | Unitlab Annotate
It is possible for vehicles to overlap if we draw bounding boxes in this way, which is okay. This informs the model that cars might appear partly or fully visible.
3. Label every object of interest in the image
AI models learn patterns best when all objects of interest are consistently annotated. For instance, if you’re training a model to detect vehicles, every visible vehicle (car, bus, or bike) should be labeled.
Leaving even a few vehicles unlabeled can introduce false negatives, meaning the model will fail to recognize objects that actually exist in the image. Over time, this weakens the model’s ability to generalize across new scenarios.
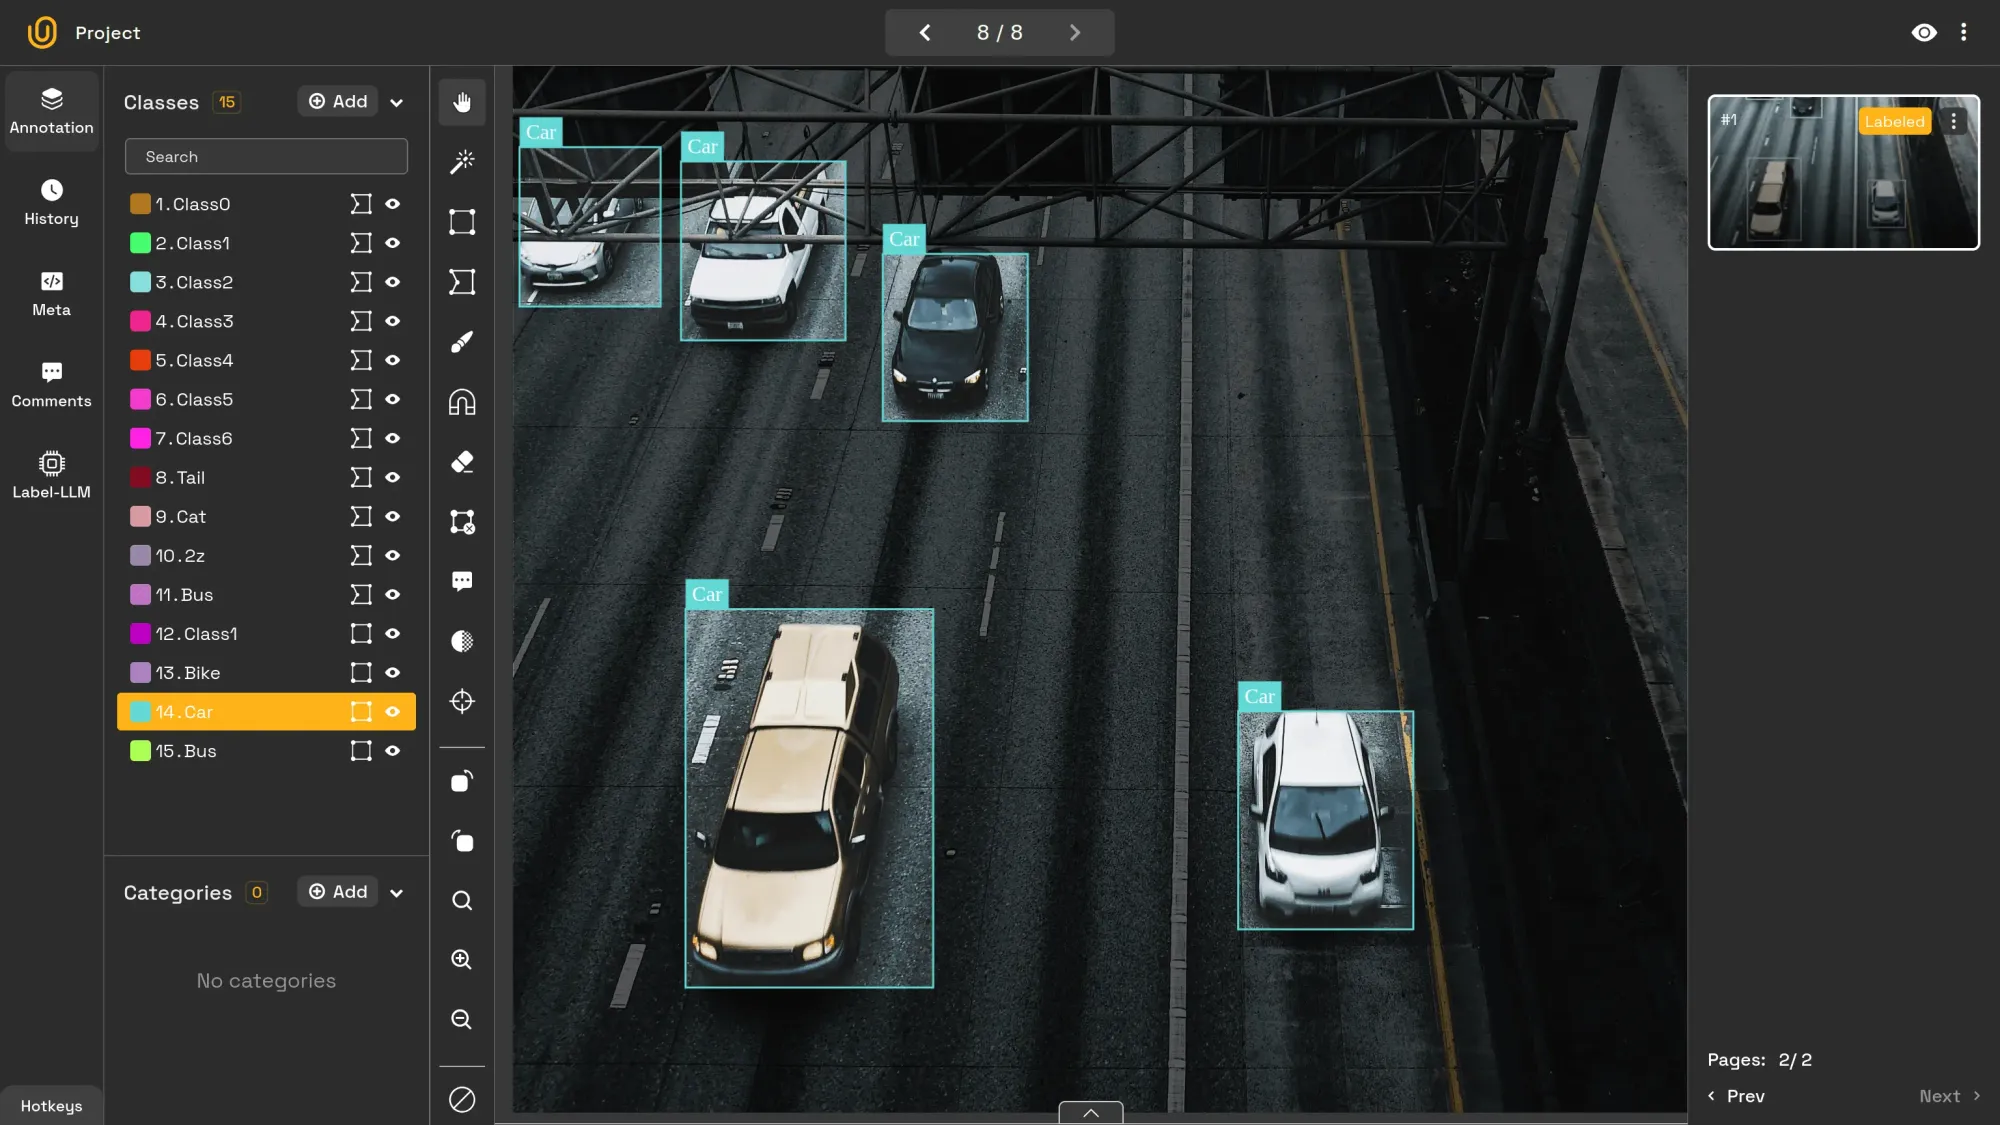
In the example image below, every vehicle in the scene should be labeled, no matter how small or distant, to ensure the dataset reflects the full diversity of real-world traffic.
Labeling every occurrence of the car instance | Unitlab Annotate
4. Use tight bounding boxes
Annotating images means assigning each pixel to an object of interest. This principle applies not only to bounding boxes but also to polygons, lines, and segmentation masks.
Your annotations should enclose each object as tightly as possible. The goal is to help your model recognize the object itself, and nothing else.
- Loose annotations include background pixels (noise), which can cause false positives or false negatives.
- Overly tight annotations may cut off parts of the object, making the model too rigid and unable to generalize.
In a street scene, if your polygon around a car includes parts of the road, the model might later mistake dark asphalt for the car body. Conversely, if your polygon excludes the car’s mirrors or bumper, the model might ignore those parts in similar images.
The rule of thumb: draw clean, tight, and complete annotations that accurately capture the visible boundaries of the object. This ensures your ML model learns from only the most relevant pixels.
5. Use specific, meaningful class names
When labeling images, use specific and meaningful class names. Generic names like Class1 or Object provide no context. Even Vehicle is too broad compared to Car, Bus, or Bike.
The computer doesn’t care what your classes are called, but you will care when it comes time to expand your project. For example, if you start with one general Vehicle class and later decide to differentiate between types, you’ll need to relabel your entire dataset.
Needless to say, this is a massive waste of money, time, and resources; not to mention lost nerves, headache, and wasted opportunities.
By using precise class names from the start, you save time and gain flexibility. You're not just labeling items; you're also classifying them in a way that supports future use cases such as:
- Counting the number of buses vs. cars in traffic data
- Training a model that recognizes specific vehicle types
- Reusing the same dataset for multiple related projects
6. Maintain consistent labeling
As your models grow, they require more labeled data to improve performance. However, adding more data points alone isn't enough; the dataset must remain high-quality and consistent.
Consistency allows the model to learn patterns efficiently without being misled by annotation errors or inconsistencies. This means every annotator must clearly understand the requirements, goals, and object definitions of the task.
When everyone follows the same standards, your dataset stays uniform across time and annotators, helping your model train faster and perform better in real-world scenarios.
Here is the guide on how to maintain consistency in data annotation:
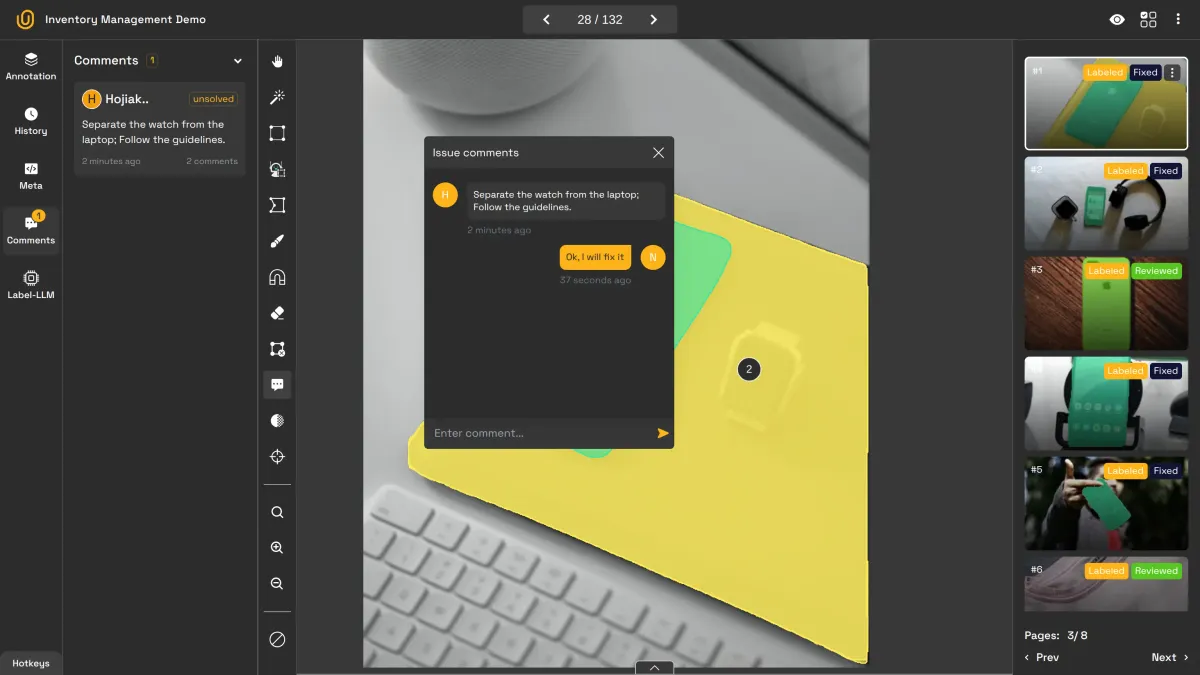
Importance of Clear Guidelines in Image Annotation
7. Use Data Annotation Platform
Modern data annotation platforms come with built-in AI models that ensure accurate and consistent labeling. If you need a specialized approach, many platforms also let you integrate your own custom AI models for tailored automation.
A robust platform should offer multiple annotation tools to match different project needs, such as bounding boxes, polygons, segmentation, or keypoints. Among these, batch auto-annotation stands out as one of the most useful features. It automatically labels large sets of images in one go.
Using AI-powered annotation can make your workflow up to 15 times faster and five times cheaper than traditional manual labeling.
How to choose among alternatives?
Here are some of the questions:
- Does it provide auto-labeling tools?
- Does it support multiple image annotation types?
- Does it have robust dataset versioning and management?
- Does it offer collaborative image labeling?
- Does it integrate custom models?
It is always best to analyze your requirements and needs, and choose the platform that provides a definite "YES" to each of the questions.
Unitlab AI is one of them.
Conclusion
Accurate and efficient AI models rely on high-quality, precisely labeled datasets. The quality of your inputs directly determines the quality of your outputs.
The following seven best practices will help you make your image annotation workflows more efficient, consistent, and reliable.
A growing trend in this space is the use of AI to automate data annotation. Leveraging AI-assisted labeling can significantly boost productivity and accuracy, making it one of the most impactful improvements for any image labeling project.
Explore More
Check out these resources for more on improving the image labeling process:
- 7 Ways to Accelerate Your Image Labeling Process
- 5 Tips for Auto Labeling
- Importance of Clear Guidelines in Image Labeling
References
- Joseph Nelson (Jan 05, 2024). How to Label Image Data for Computer Vision Models. Roboflow Blog: Source
- Pavan Yadav (Dec 12, 2023). Tips for labeling images for object detection models. ArcGIS Blog: Source